Category

Recipes

Category

epcot-cronut-croissant-donut-4

Walking around Epcot, you can’t help but look at the different kiosks to see the different snack options. Strolling along Epcot, I spotted Croissant Doughnuts at the Refreshment Port.

epcot-cronut-croissant-donut-1

Using my dining plan, I grabbed the Croissant Doughnut tossed in cinnamon sugar.

epcot-cronut-croissant-donut-2

It was pretty large, but it was drenched in oil and hard to eat. You’ll need a knife and fork for this.Grab a napkin because it will come in handy. I wouldn’t get this again.

epcot-cronut-croissant-donut-3

We Rate Croissant Doughnut1rated

Address:
200 Epcot Center Dr, Lake Buena Vista

Website:
https://disneyworld.disney.go.com/dining/epcot/refreshment-port/

The Refreshment Port Menu, Reviews, Photos, Location and Info - Zomato

pc-Summer-insider-4

Summer is here and what better way to celebrate than having a picnic outdoors with friends. President’s Choice took a few of us out for a picnic at Stanley Park to give us a nice sneak peek of the Summer PC Insiders Collection and some recipes to go with those products.

I go to Superstore a few times a week and I’ve been a fan for a long time. Below are a few items that I enjoyed and would remake for my Summer celebrations.

Grilled Bread with Lemon Ricotta and Tomatoes of Yore

pc-Summer-insider-5

Pretty simple to make and you just pile the ingredients on top of each other. Very fresh and showcases the amazing combination of ricotta and tomatoes.

Melon with grilled Halloumi cheese, arugula, radish and pistachio

pc-Summer-insider-6

A great combination and halloumi cheese is an excellent cheese to grill since it won’t melt easily due to it’s high melting point.  The cantaloupe-like melon brings the sweetness, and arugula and radishes give this salad a peppery bite.

[tabs tab1=”Recipe” ]

[tab id=1]

Serves: 6
Prep time: 15 minutes
Cook time: 5 minutes
Difficulty Level: Intermediate

Ingredients:

  • Half melon, halved, peeled, seeded and thinly sliced
  • 1 pkg (250 g) PC Halloom Semi-Soft Unripened Cheese, cut crosswise in 8 slices
  • 3 Tbsp (45 mL) extra virgin olive oil
  • 1/2 tsp (2 mL) freshly ground black pepper
  • 1 Tbsp (15 mL) fresh lemon juice
  • 2 cups (500 mL) loosely packed baby arugula
  • 2 medium radishes, thinly sliced
  • 2 Tbsp (25 mL) chopped roasted pistachios

Directions:

  1. Preheat barbecue to medium heat; grease grill. Arrange melon slices on a serving platter; set aside.
  2. Toss cheese with 1 Tbsp (15 mL) of the olive oil and the pepper. Grill 2 to 3 minutes, turning once halfway, or until lightly charred and softened.
  3. Whisk together remaining 2 Tbsp (25 mL) olive oil and lemon juice. Combine arugula and radishes in large bowl; toss together with half of the dressing.
  4. Arrange grilled cheese on top of melon. Scatter salad on top; sprinkle with pistachios and drizzle remaining dressing around platter.

[/tab]

[/tabs]

Grilled Pico de Gallo Shrimp

pc-Summer-insider-8

This was one of my favourite appetizers! The Mexican-inspired pico de gallo salsa acts as both marinade and sauce in this brightly-flavoured barbecued shrimp appetizer.

[tabs tab1=”Recipe”]

[tab id=1]

Serves: 6
Prep time: 10 minutes
Cook time: 5 minutes
Marinate Time: 20 minutes
Difficulty Level: Easy

Ingredients

  • 1 pkg (400 g) PC Raw Zipperback Black Tiger Shrimp – Gigantico 16-20 Count, thawed
  • 1 Tbsp (15 mL) PC 100% Pure Safflower Oil
  • 1/2 Tsp (2 mL) ground coriander
  • 1/2 Tsp (2 mL) ground cumin
  • 1/2 cup (125 mL) PC Pico de Gallo Mild Salsa

Directions:

  1. Peel shrimp, leaving tails on. Toss shrimp, oil, cumin, coriander and 1/4 cup (50 mL) of the pico de gallo in bowl, stirring until coated. Cover and chill for 20 minutes.
  2. Preheat barbecue to medium-high.
  3. Place shrimp on grill; cook 3 to 4 minutes per side or until golden-pink and cooked through. Place in clean serving bowl; toss with remaining pico de gallo. If desired, garnish with lime wedges and coriander sprigs. Serve hot.

[/tab]

[/tabs]

Thai Mango Salad

pc-Summer-insider-9

This Thai take-out favourite is easily made at home. Don’t worry about how ripe the mangoes are, it is equally delicious made with green (unripe) mangoes; in fact, it is easier to cut an under ripe mango although it is more tart.

[tabs tab1=”Recipe” ]

[tab id=1]

Serves: 5
Prep time: 20 minutes
Difficulty Level: Intermediate

Ingredients:

  • 1 small clove garlic, minced
  • Half red finger chili, sliced in thin rounds (with seeds)
  • 1 Tsp (5 mL) granulated sugar
  • 3 Tbsp (45 mL) fresh lime juice
  • 4 Tsp (20 mL) fish sauce
  • 1 Tbsp (15 mL) PC 100% Pure First-Pressed Canola Oil
  • 2 PC Flavour Burst Kent Mango
  • 2 carrots, cut in thin matchsticks
  • 2 green onions, thinly sliced
  • Half sweet red pepper, cut in thin matchsticks
  • 1/3 cup (75 mL) lightly-packed cilantro leaves
  • 1/3 cup (75 mL) lightly-packed leaves PC Fresh Mint
  • 1/3 cup (75 mL) PC Dry Roasted Lightly Seasoned Peanuts, chopped

Directions:

  1. Stir together garlic, chili, sugar, lime juice, fish sauce and oil in large bowl until sugar is dissolved. Set aside.
  2. Peel mangoes with vegetable peeler. Cut flesh away from pits. Cut one mango into thin matchsticks and thinly slice the other.
  3. Add mangoes, carrots, onions, pepper, cilantro and mint to lime dressing in bowl; toss to combine. Transfer to platter; sprinkle with peanuts.

TIP: A mandolin is the best tool to achieve evenly julienned vegetables in the minimum time.

[/tab]

[/tabs]

Grilled Jalapeño Brisket Burger

pc-Summer-insider-10

Smoke and spice balance perfectly in this southern-style brisket burger recipe. Grilling the jalapeño peppers tames their heat a bit, and adds extra yummy charred flavour.

[tabs tab1=”Recipe” ]

[tab id=1]

Serves: 6
Prep time: 15 minutes
Cook time: 20 minutes
Difficulty Level: Intermediate

Ingredients:

  • 1 pkg (852 g) PC Slow Smoked Brisket Beef Burgers
  • 3 oz (90 g) PC Monterey Jack Cheese with Jalapeño, cut in 12 slices
  • 1 medium red onion, thinly sliced
  • 6 jalapeño peppers, halved lengthwise and seeded
  • 6 soft white burger buns
  • 2/3 cup (150 mL) PC Texas Caviar Mild Bean Salsa

Directions:

  1. Preheat barbecue to medium heat.
  2. Place frozen burgers on greased grill; cook, lid down, 5 to 6 minutes per side or until cooked through. Top each burger with two slices of cheese; close lid 1 minute to melt. Meanwhile, cook onion and jalapeños in grill basket on grill 5 to 6 minutes, stirring occasionally, or until very tender and blistered.
  3. Open buns; divide salsa evenly among bottom half of buns. Top each with a patty, one-sixth of the onions, and 2 pieces of pepper. Close with top bun and serve immediately.

[/tab]

[/tabs]

BBQ Lamb on Beet Hummus Flatbread

pc-Summer-insider-11

Reminiscent of Turkish-style pizzas called pide, the appetizer flatbread recipe features red beet hummus and crumbled lamb for a fresh and stylish version that’s easy to serve at any summer gathering.

[tabs tab1=”Recipe” ]

[tab id=1]

Serves: 10
Prep time: 20 minutes
Difficulty Level: Intermediate

Ingredients:

  • 1/2 lb (250 g) PC Lean Ground Australian Lamb
  • 2 cloves garlic, minced
  • 2 Tbsp (25 mL) grated onion
  • 1 Tsp (5 mL) toasted cumin seeds, crushed in mortar and pestle
  • 3/4 Tsp (4 mL) ground coriander
  • 3/4 Tsp (4 mL) paprika
  • 1/2 Tsp (2 mL) each salt and freshly ground black pepper
  • 1 Tbsp (15 mL) PC New World EVOO Extra Virgin Olive Oil
  • 3 Tbsp (45 mL) each chopped fresh parsley and mint
  • 1 pkg (220 g) PC Appetizer Flatbreads
  • 1 pkg (280 g) PC Beet Hummus Chickpea Dip and Spread
  • 2/3 cup (150 mL) PC Crumbled Goat’s Milk Chevre Soft Unripened Cheese
  • Lemon wedges

Directions:

  1. Preheat barbecue to medium heat; grease grill.
  2. Combine lamb, garlic, onion, cumin, coriander, paprika, salt, pepper and oil. Using hands, gently mix until just combined. Form into three 4-inch (10 cm) patties; let stand 20 minutes.
  3. Grill patties 6 to 8 minutes, turning halfway, or until cooked through. Transfer to plate; crumble into small pieces using two forks. Sprinkle with parsley and mint; set aside.
  4. Grill flatbreads 30 to 60 seconds per side or until golden with grill marks; transfer to cutting board.
  5. Divide hummus between flatbreads; spread evenly to cover. Top with lamb and cheese. Garnish with freshly ground black pepper and a drizzle of olive oil, if desired. Cut each flatbread into five pieces; squeeze lemon over top. Serve immediately.

TIP: You can substitute PC Soft Unripened Goat’s Milk Cheese and crumble it yourself if you prefer.

[/tab]

[/tabs]

Loads of Spinach & Parmesan Atlantic Salmon Burgers

pc-Summer-insider-12

I usually don’t like Salmon Burgers, but the PC Loads of Spinach & Parmesan Atlantic Salmon Burgers was so good! It was one of the top items of this picnic.

pc-Summer-insider-2

A few items that I would want to stock up in my fridge this Summer would be the PC Loads of Spinach Parmesan Atlantic Salmon Burgers, PC Sriracha Mayo Sandwich Spread, PC Cream First Speculoos Cookie Butter Ice Cream, and the PC Pico Di Gallo Mild Salsa.

Website:
http://www.presidentschoice.ca/en_CA/insiders-collection.html

pc-Summer-insider-1

chia-pudding-2

I’m not a fan of overly complicated recipes and I like to make breakfast without thinking too much. I really can’t function much in the morning. Less ingredients, the better. Putting together chia pudding with pomegranate seems easy enough.

Chia is a superfood native to Mexico’s central valleys. Chia, often gifted to the Gods, was the third most consumed plant source after corn and beans by the Aztecs and Mayans, who were the first to cultivate the seed.

chia-pudding-3

Chia seeds are light in taste which makes them easy to integrate in your daily diet as they do not alter the flavour of your dishes. You can add chia to smoothies, juices, and other beverages, or throw them in your soups, salads and sauces. Sprinkle chia on your oatmeal, yogurt and cereal, or use chia in your cake recipes as a substitute for eggs or as a thickener. I’m sure you’ve seen it on a lot of Instagram breakfast pictures.

chia-pudding-5

To put together the chia pudding, all you need are 3 things:

  • 1 part chia seed
  • 2 parts unsweetened almond milk
  • As much fruit as you want

Mix the chia seed and almond milk and set aside until it turns into a tapioca consistency. Once it’s set, add your fruit on top. It can be berries, banana, granola or whatever. I went with pomegranates.

If you need added sweetness, you can use sweetened almond milk, or add in honey, agave syrup or maple syrup. For myself, I found that the fruit helped add the sweetness.

chia-pudding-4

Chia pudding is great for breakfast and you can prepare it the night before. Low in calories and pretty filling.

chia-pudding-1

I used the Prana ProactivChia seeds ($7.99), which is certified organic, kosher, vegan, preservative-free, gluten-free, GMO-free, and sulfite-free. It can be found in more major grocery stores in Canada.

trans-outer

Transylvanian Traditions is located on Davie Street in Vancouver and they make delicious dessert. No vampires here. Narcisa Stoian noticed the lack of traditional Romanian sweets, which have always been a part of her childhood and her parents’ careers, and decided that Vancouver was the perfect place for her to share her love of Romanian cuisine.

trans-counter

If you miss the taste of Romanian and European desserts, definitely make a visit here. If you look closely, they have vampire mugs here.

trans-case

They selection of desserts isn’t too large, but you will find something that you will enjoy.

trans-displaytrans-chimney  trans-cream

Creames is made with homemade filo pastries combined with vanilla cream cake, covered by a layer of whipping cream mixed with roasted walnuts. I thought it was ok, but M loved it. 

trans-long

Chocolate Eclair is a cream puff filled with special recipe chocolate cream and home-made whip cream. This was so good and really just sinfully delicious. I would order this again.

trans-profiterole

Profiterole has vanilla cream puffs embedded in fluffy chocolate mousse cake. It is topped with whipped cream and has a chocolate drizzle on top.

Overall, we both enjoyed it and the prices were reasonable. It’s not a super fancy place but it has great taste and awesome to bring to potlucks or parties.

We Rate Transylvanian Traditions:

Address:
1111 Davie Street, Vancouver

Website:
http://transylvaniantraditions.com/

Click to add a blog post for Transylvanian Traditions on Zomato

bombay-sapphire-east

Bombay Sapphire East is Bombay Sapphire’s next offering with taste of Thai lemongrass and Vietnamese black peppercorn flavours into the original Bombay Sapphire flavour combination – juniper, citrus, angelica, orris root, coriander, liquorice, cassia bark, almonds, cubeb berries and West African grains. You sure get a gin that reflects the spices of a lot of Asian countries.

This gin packs a punch at 42%.

I’m usually pretty boring and ask for a gin and tonic, but today I got to try it in some awesome summer cocktails – Loosen the Know and Eastern Crush.

food-cart-fest-bombay

[tabs tab1=”Loosen the Know” ]

[tab id=1]

 one serving 

  • 0.5 oz simple sugar water
  • 0.5 oz freshly squeezed lemons (lemon juice can be substituted)
  • 1 oz Bombay Sapphire East
  • 2-2.5 oz of sparkling wine
  • a scoop of lemon ginger sorbet gelato

In a serving glass or a pitcher, mix in the simple sugar water, freshly squeezed lemons, and Bombay Sapphire East. Then top it off with sparkling wine and the gelato.

[/tab]
[/tabs]

bombay-sapphire-gelato

bombay-sapphire-loosen-the-know

It’s very refreshing and I would have never thought gelato and gin would go well together. The sparkling wine pairs nicely too to add the carbonation.

bombay-sapphire-strain-watermelon

[tabs tab1=”Eastern Crush“]

[tab id=1]

one serving 

  • 3 chunks of watermelon or 2 oz watermelon juice
  • pinch of cilantro
  • 0.5 ounce of sugar
  • ¾ oz of freshly squeezed lemons
  • 1 oz Bombay Sapphire East
  • a sprinkle of grounded black pepper
  • ice

In a shaker cup, muddle the watermelon, cilantro, sugar and lemon together. Then, add in the Bombay Sapphire East, black pepper, ice and shake away. Then, strain out the mixture into your cup of ice and then garnish with cilantro.

[/tab]
[/tabs]

bombay-sapphire-garnish

bombay-sapphire-eastern-crush

I just love watermelon, I can’t get enough of it in the Summer to just cool down.

bombay-sapphire-bottle

You can pick up Bombay Sapphire East at your local liquor store. If you’re looking for a different type of gin to try out this summer, definitely give it a try.

bombay-sapphire-logo

ling_yen_mountain_temple_2nd

Ling Yen Mountain Temple is located on “Highway to Heaven“. The road is named after the 60 temples, mosques, churches and chapels that stand side by side on No. 5 Road.

They opened in 1999 and the temple has a traditional  Chinese quadrangular building. The temple is in the Pure Land  tradition of Ling Yen Shan near  Suzhou, Jiangsu, China. It is an offshoot of Ling Yen Shan monastery near Puli, Nantou, Taiwan, which was founded by Master Miao Lien in 1984.

ling_yen_mountain_temple_main

The temple has regular celebrations of events during different seasons. During the celebration of Buddha’s birthday and Chinese New Year, the building is surrounded with 1000 special lanterns. Paramita Ball prayers are also set out on occasion.

ling_yen_mountain_temple_dragon

They are open for tours and for guest to come and seek wisdom. There are over 10,000 members in Greater Vancouver as well as a few resident monastics that live here.

We weren’t able to take photos of the inside where the big Buddha statues are, but they are quite nice.

ling_yen_mountain_temple_garden

They have a garden where they grow things, but since it was the winter, nothing much grew when we were here.

ling_yen_mountain_temple_otherside

Everyday, they offer free vegetarian lunches to their guests.

lingyen-puretaste-puremind

Here are a few recipes from their Vegetarian Cook Book – Pure Taste Pure Mind. The recipes were compiled by their volunteers. You can grab a copy of their book from the temple for free.

[tabs tab1=”Crispy Tofu Balls” tab2=”Braised Spongy Gluten” tab3=”Pineapple Shortcake”]

[tab id=1]

crispy-tofu-balls

Ingredients:

  • 1 piece of firm tofu
  • 3 sheets of nori
  • a few sprigs of Thai basil
  • 100g button mushrooms
  • vegetarian ham
  • potato starch
  • pinch of salt
  • pinch of pepper
  • dash of oil

Instructions:

  1. Wash the tofu. Drain and mash into a paste. Cut the nori into small pieces. Wash and mince the Thai basil and button mushrooms. Mince the vegetarian ham.
  2. Add salt and pepper, and thoroughly mix all ingredients. Make 2cm wide balls with the pasta
  3. Lightly and evenly cover the balls with potato starch. Let them sit for a few seconds and then deep-fry until golden brown.

[/tab]
[tab id=2]

braised-spongy-gluten

Ingredients:

  • 1 pack of baked spongy gluten
  • 5 dried shiitake mushrooms
  • 4pcs bamboo shoots
  • several dried daylily flowers (soak until tender and cleaned)
  • several pieces of black wood ear mushrooms (soak until tender and cleaned)
  • peanuts
  • 13-15 tsp of oil
  • 10 tsp of soy sauce
  • 6.5 tsp of sugar
  • cornstarch
  • slices of ginger
  • sesame oil

Instructions:

  1. Julienne and stir-fry bamboo shoots in a preheated skillet with oil. Add a splash of water and cook for 2 minutes. Add 1 tsp of soy sauce and 1/2 tsp of sugar. Stir well. Remove from heat and set aside.
  2. Blanch spongy gluten. Remove from water and squeeze dry. Shred into small pieces. In a preheated skilled with 5 tsp of oil, add 5 -6 pieces of ginger and cook until aromatized. Add spongy gluten and cook until golden brown. Remove from heat and set aside.
  3. Soak shiitake mushrooms in water until soft. Wash and cut into small pieces. Add 1 tsp of soy sauce and a bit of cornstarch; mix well. In a skillet, heat 2 tsp of oil. Pour in the shiitake mushrooms and stir-fry for about 3 minutes. Remove from heat and set aside.
  4. In a skillet, heat 3 tsp of water, 6-7 tsp of oil, 8 tsp of soy sauce, 6 tsp of sugar and a pinch of grated ginger. Add daylilies and wood ear mushrooms. Cook for 8 minutes until tender. Stir in spongy gluten and shiitake mushrooms. Add bamboo shoots and mix. Reduce heat and simmer until the sauce thickens. Drizzle some sesame oil and serve. Add peanuts as garnish if desired.

[/tab]
[tab id=3]

pineapple-shotcake

Ingredients:

  • 55g unsalted butter
  • 45g vegetable shortening
  • 35g icing sugar
  • 15g evaporated milk
  • 150g all purpose flour
  • 15g skim milk powder
  • 500g pineapple jam

Instructions:

  1. Cream butter and vegetable shortening together. Mix in the icing sugar. Add evaporated milk into the mixture and beat together.
  2. Sift in skim milk powder and flour. Mix well.
  3. Fill out the dough and cut into pieces. Put some pineapple jin in the center of the dough pieces and press them into a mold. Take them out and line them on a baking sheet. Bake for 9 minutes in an oven preheated at 350F. Flip the shortcakes and bake for another 6 minutes.

Cooking tips:

A typical square mould for pineapple shortcake calls for 25g of dough and 25g of filling. If you use a smaller, flatter mold, use about 15g of dough and 15g of filling. For flower-shaped molds, experiment with the amount of dough and filling needed. Most standard pineapple shortcakes have a dough-to-filling ratio of 1:1.

[/tab]

[/tabs]


sideribs-korean-kalbi-sauce

I love Korean marinated meats and something about the flavour is so addictive. Especially when it’s spicy!

Hot Kalbi Pork Side Ribs can easily be made in a slow cooker. I wanted to make a no fuss meal and there was already a pre-made marinade from T&T.

sempo-kalbi-sauce

Sempio creates a wide variety of kalbi sauces, but there aren’t a lot of brands at the store that sold the spicy version. If you are lazy to make your own hot kalbi sauce, this is a good option.

sideribs

I got a pack of side ribs from T&T and it was about $14 per pack. It’s not too fatty and there was still lots of meat on  the bones.

sideribs-korean-slow-cooker

Put the side ribs and half a bottle of the Hot Kalbi Sauce in the slow cooker for 6 -8 hours on low. Make sure all the ribs are coated with the sauce.

sideribs-korean

Once it’s done, serve it with your meal and you can cut it up so they become little rib bites. There is a decent amount of spice to the ribs and not too spicy. Since the ribs are cooked in the slow cooker, the meat is tender.

Website: http://www.sempio.com/

turkey-congee2

After Thanksgiving, most Chinese families look forward to turning the scraps into Turkey Congee. Anytime we have the opportunity to make turkey, I make it just so we can make turkey congee! Seriously, it’s so damn good!

My mom wanted to share her recipe with you…and of course teach me how to make this for the future so I could stop bugging her. I joke, she always loves feeding me.

[tabs tab1=”Ingredients” ]

[tab id=1]

  • 8 cups of water
  • 1 cup of Turkey Stock
  • 1.5 cups of rice
  • 150g of shredded turkey
  • 1 slice of ginger
  • 2 shiitake mushroom, sliced
  • 65g of salted mustard green, sliced
  • 1 teaspoon of salt
  • bits of leftover vegetables

[/tab]

[/tabs]

turkey-congee-broth

The turkey stock is taken from the pan drippings from the cooked turkey. Just strain out the particles with a fine strainer. You can keep the stock for up to a week in the fridge.

Start off with the turkey stock and water on medium heat.

turkey-congee-salted-green-mustard

Salted Mustard Greens is a form of pickled cabbage. We add it into the congee to give it more flavour and texture. You can find this at asian grocery stores. In Vancouver, we picked this up at T&T. We used about 65g of sliced mustard greens, which is like a small handful.

turkey-congee-turkey

Measure out your shredded turkey meat or just have a bowl full.

turkey-congee-cooking

Add in the salted mustard greens, turkey, salt, rice, ginger, and vegetables.

turkey-congee-pot

Then lastly, add in the shiitake mushrooms. Once all the ingredients are in the pot, we let it simmer for about 45 minutes.

turkey-congee-pot-done

It’s ready when the rice thickens it up and has the consistency of porridge. You can leave it for longer if you don’t want it too soupy.

turkey-congee

Once it’s done, you can enjoy this for days! I seriously could eat it for all my meals.

cola-pulled-beef-moist

M got me an Instant Pot for Christmas and I was itching to slow cook something. Mags told me to slow cook beef with a can of Coca-Cola, so I really wanted to give it a try. The secret to tender meat is cooking it at a low temperature for a long period of time.

cola-pulled-beef-all

[tabs tab1=”Ingredients” ]

[tab id=1]

  • 2 pounds beef roast
  • 1 cup of Coca-Cola
  • 1 inch of fresh ginger, peeled
  • 1 garlic, peeled
  • 1 onion, sliced
  • 1 jalapeno, minced
  • 1 cup of soy sauce
  • 1 tablespoon of sesame oil
  • 2 tablespoons of rice vinegar
  • a splash of fish sauce

[/tab]

[/tabs]

cola-pulled-beef-items

cola-pulled-beef-ingredients

cola-pulled-beef-onion

Prepare the onions, jalapeno, ginger, and garlic. It’s always easier prepping the ingredients ahead of time so you save some time.

cola-pulled-beef-roast

Take your beef roast and sear all sides by browning it. You can either turn on the Saute function of the Instant Pot to do this or brown it on a frying pan.

cola-pulled-beef-setting

cola-pulled-beef-browning

It will only take a minute or so to brown each side.

cola-pulled-beef-sear

Once it is down browning, add in the onion, garlic, jalapeno, ginger, soy sauce, fish sauce, sesame oil and rice vinegar.

cola-pulled-beef-add

Don’t forget the Coca-Cola.

cola-pulled-beef-cola

cola-pulled-beef-set

Turn the slow cooker on for 8 hours and let it do it’s thing.

cola-pulled-beef-cooked

Once the beef roast is done, it will be tender and falling apart.

cola-pulled-beef-shredded-2

You can eat it for dinner or eat it as a breakfast. I paired it with scrambled eggs. Tons of protein for breakfast!

cola-pulled-beef-shredded

kimchi-stew-pot

Kimchi guk 김치 찌개 or Kimchi Soup is M’s specialty. He would make this for me years ago when we were dating and still continues to make it to this very day. I just have to ask him kindly.

It’s a popular dish among Koreans all year round and you eat it with rice. Kimchi soup is very easy to make.

kimchi-stew-kimchi

[tabs tab1=”Ingredients”]

[tab id=1]

  • 3 cups Kimchi
  • 1 Tin of Canned Tuna
  • 1 Can of Spam
  • 1 Block of Tofu
  • 5 cups of Water
  • Drizzle of Olive Oil

[/tab]

[/tabs]

kimchi-stew-simmer

Drizzle olive oil at the bottom of your pot and add in the kimchi with a bit of juice from the package. Let the kimchi simmer on medium for 5 minutes as it really transforms the taste.

I buy pre-cut kimchi so I don’t have to make a mess in the kitchen. If you have the onces with the whole kimchi, then chop it up into smaller pieces.

kimchi-stew-water

Pour the water into the pot.

kimchi-stew-tuna

Add in the canned tuna. I like using the Korean kind as it’s so much moist and flavourful than the other brands.

kimchi-stew-spam-pot

Chop up some spam and add it into the pot. Let it boil on medium for about 15 minutes.

kimchi-stew-tofu

Chop up some tofu and add it in last.

kimchi-stew-tofu-pot

Boil for an additional10 minutes and it’s done.

kimchi-stew

Pour some kimchi soup over steamed rice and enjoy! Easy to make and it’s not complicated.

mac-and-cheese-plated

My earliest introduction to Mac and Cheese was the ones from Kraft Dinner. You mix the mysterious yellow packet of ingredients with the macaroni, water, margarine and milk,  then instantly you have dinner. I loved it as a kid because I had no idea what I was eating.

M wanted to cook up a grown up version of mac and cheese with real cheese, fragrant herbs and of course BACON.

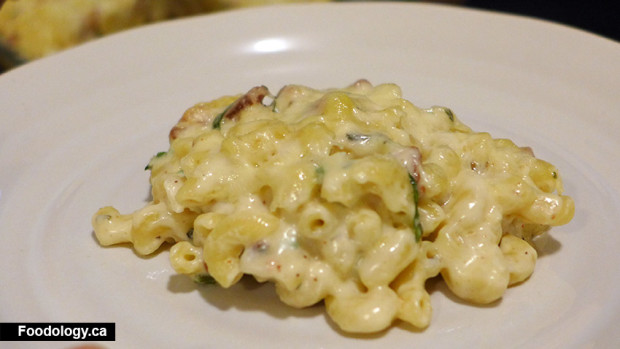
It’s a great dish for parties and your friends will love the Creamy Bacon Mac and Cheese.

mac-and-cheese-ingredients

[tabs tab1=”Ingredients” ]

[tab id=1]

  • 2 cups dried macaroni pasta
  • a pack of crisp bacon, chopped
  • 3 tablespoon butter
  • 3 tablespoon flour
  • 3 cups half and half
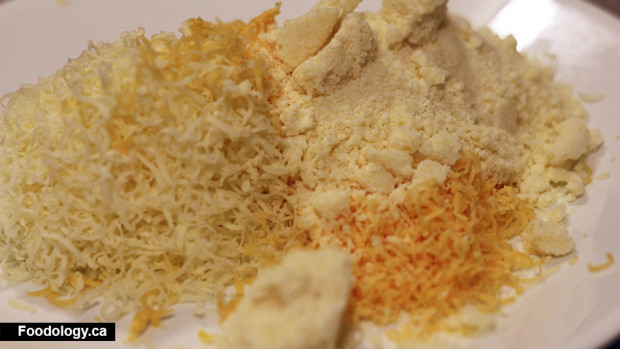
  • 2 cups sharp cheddar, shredded
  • 1 cup mozzarella, shredded
  • 1/2 cup parmigiano reggiano, finely grated
  • 1 teaspoon rosemary, chopped
  • 1 teaspoon thyme, chopped
  • 2 tablespoon basil, chopped
  • 2 tablespoon green onion, chopped
  • 5 cloves of garlic, minced
  • 1 teaspoon cayenne pepper
  • salt and pepper

[/tab]

[/tabs]

mac-and-cheese-green-onion

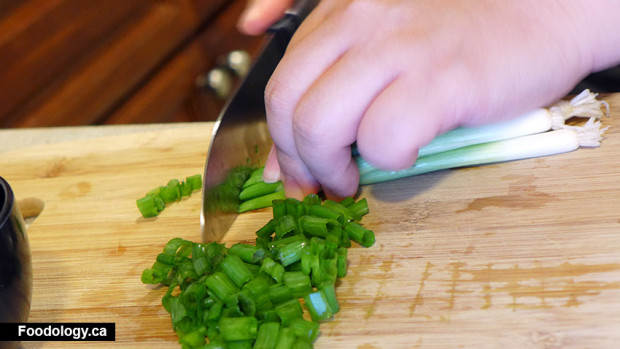
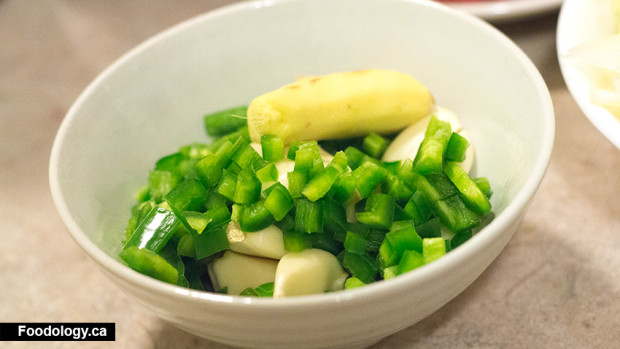
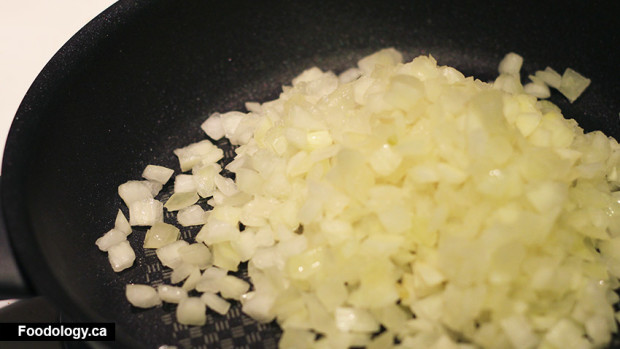
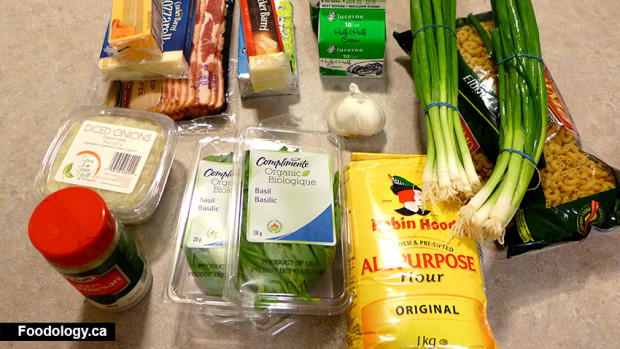
Prep the ingredients – basil, rosemary, thyme, garlic, and green onions.

mac-and-cheese-cheeses

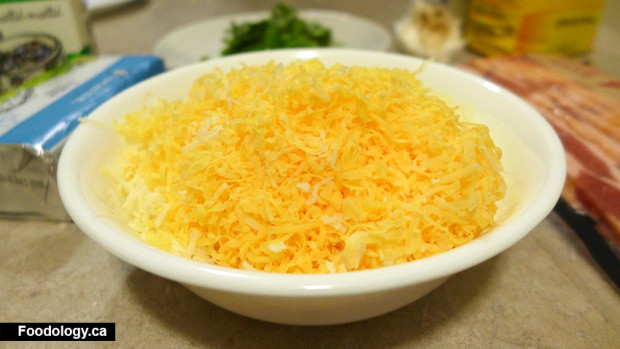
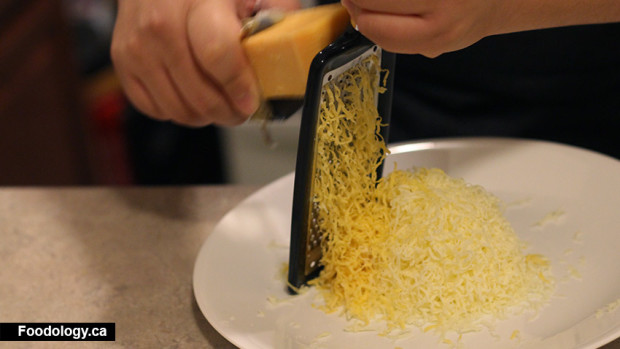
Pre-shred the different cheeses and set them aside.

mac-and-cheese-boil

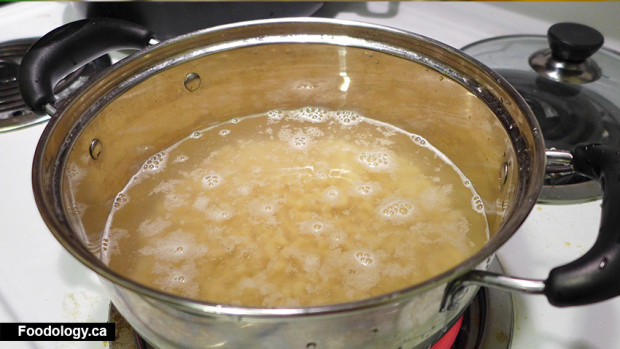
In a pot, bring water to a boil and add in pinch of salt. Then add the macaroni. This should take about 7 minutes.

mac-and-cheese-pasta

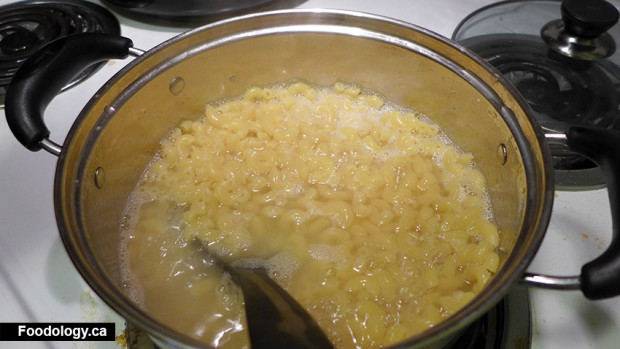
Once the pasta is cooked to al dente, drain the pasta and rinse with cold water to stop the cooking process. The set it aside for later.

mac-and-cheese-sauce

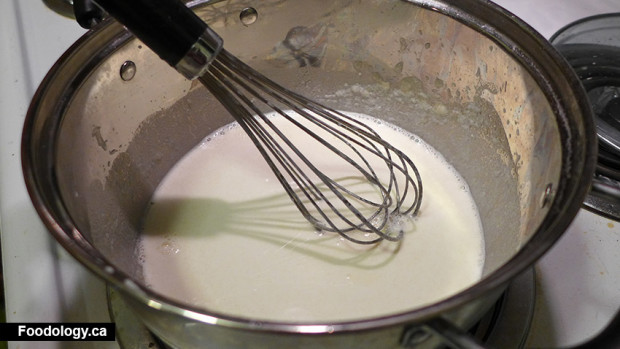
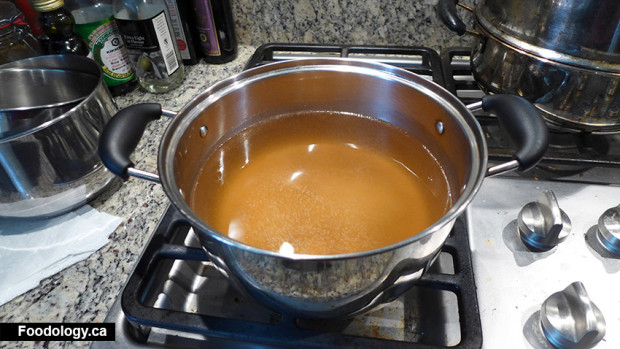
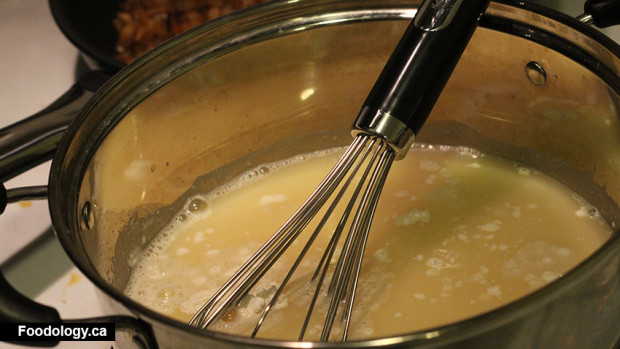
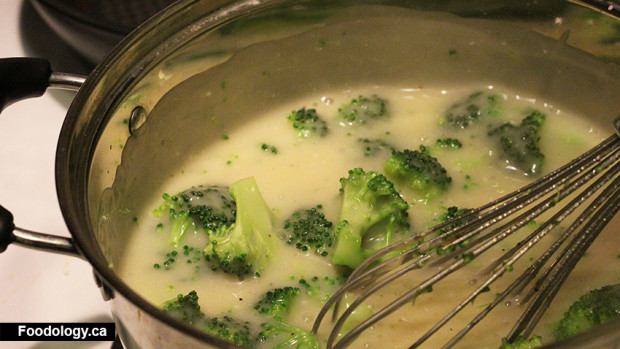
In a pot, heat the butter on medium heat until melted. Whisk in the flour to create a roux and try to remove any lumps in the mixture. Then mix in the half and half.

mac-and-cheese-herb

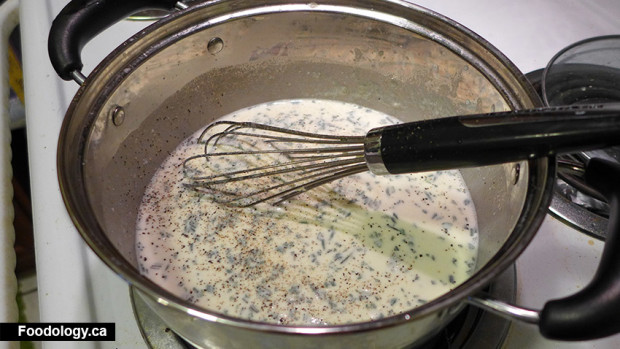
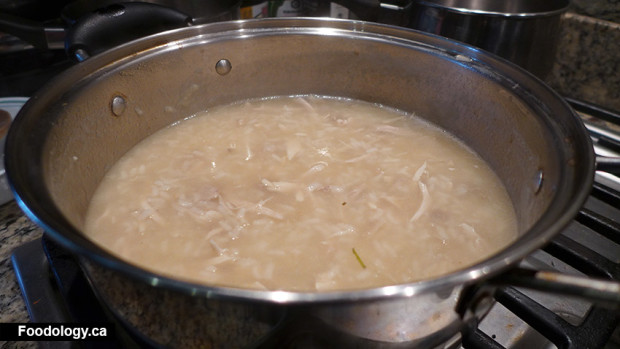
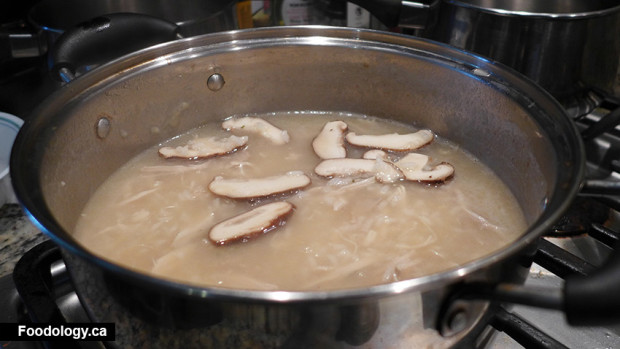
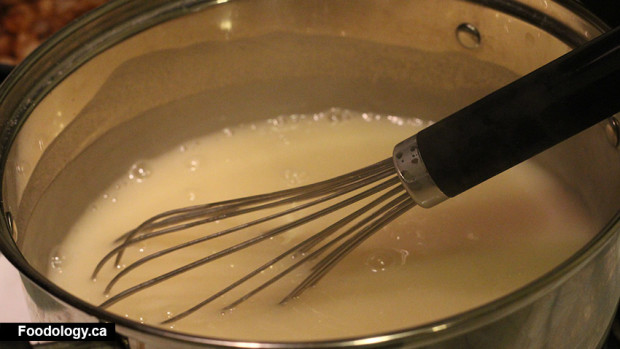
Then add in the rosemary, thyme, salt, pepper, cayenne pepper, and garlic. Keep on whisking until the mixture gets thick enough to cover the whisk.

mac-and-cheese-add-cheese

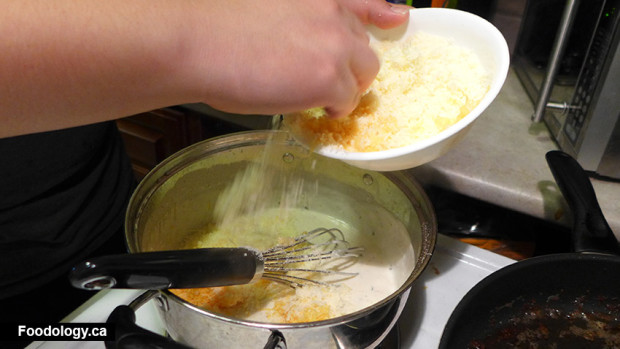
Mix in the cheddar and parmigiano reggiano cheese. Stir until all of the cheese is melted and the mixture is smooth.

mac-and-cheese-mix

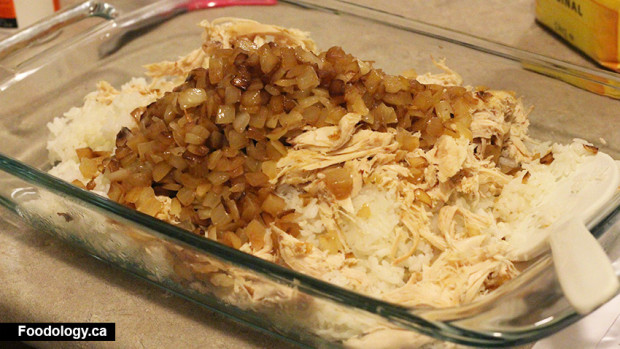
In a separate bowl, mix in the macaroni, cheese mixture, green onions, and basil.

mac-and-cheese-bacon

Prepare your bacon in a frying pan. You can alternatively use a oven, but I find the grease splatters a bit of a pain to clean up. Cook them until they are nice and crispy. Don’t be afraid to steal a few pieces to snack on. That’s why we prepared a whole pack.

mac-and-cheese-chop-bacon

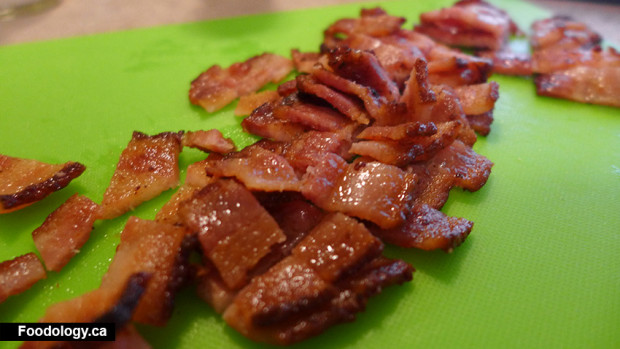
Once the bacon has cooled off a bit, chop them up into little pieces.

mac-and-cheese-add-bacon

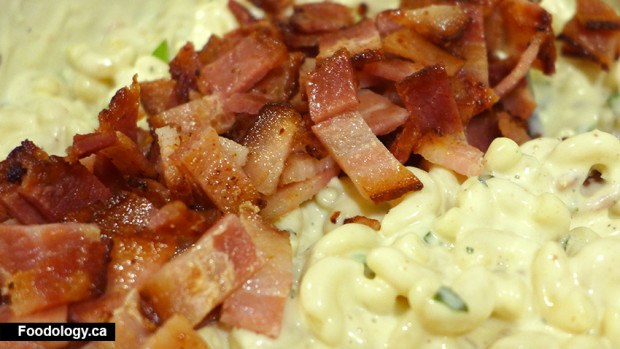
Mix them into the macaroni mixture until well combined.

mac-and-cheese-cheese

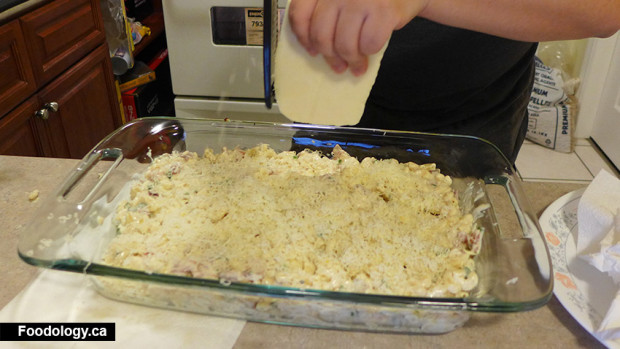
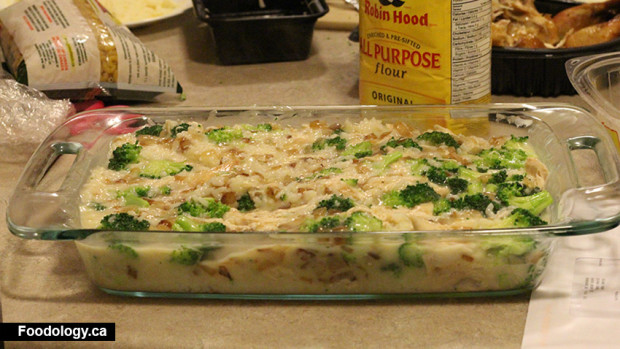
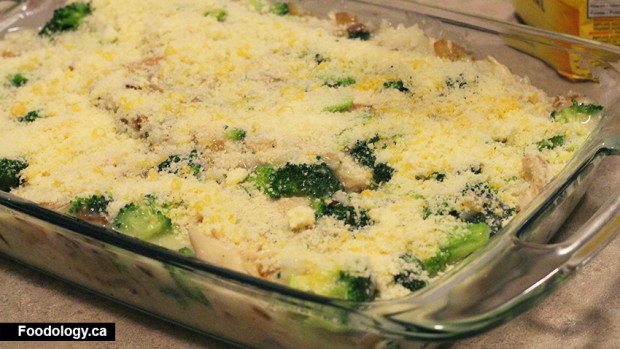
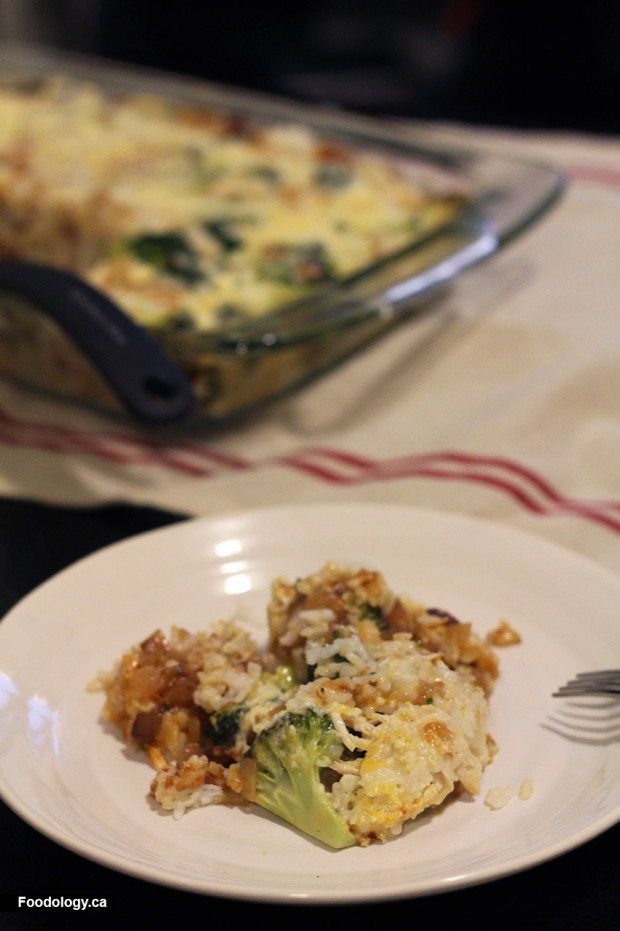
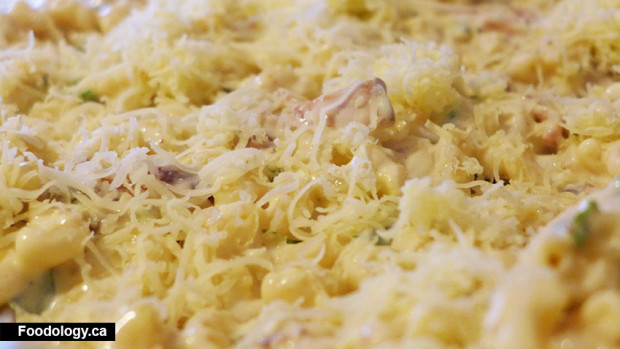
Place the mixture into a casserole pan and sprinkle the shredded mozzarella cheese on top.

mac-and-cheese-closeup

Put the mac and cheese into your oven at 400 degree oven for 30 minutes in the middle rack.

mac-and-cheese-done

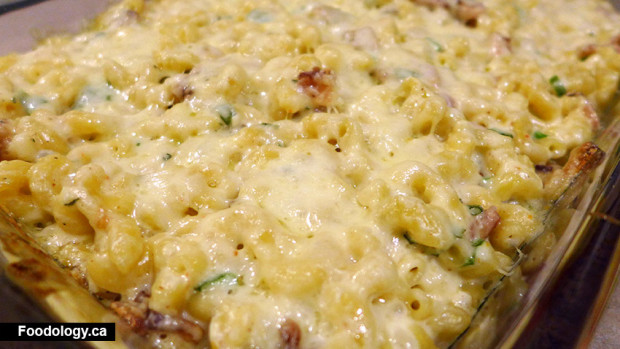
Once it’s ready, let it cool and serve!

chicken-briased-plate

I really love chicken especially when you find the perfect combination of ingredients to make your marinade. For this particular day, I wanted chicken and vegetables, so I thought roasting some vegetables and marinating chicken thighs would make for a simple meal.

The hard part is to figure out what should I add into it. I have a pretty limited amount of spices lying around the kitchen, so I added them all in.

chicken-add

[tabs tab1=”Ingredients” ]

[tab id=1]

Marinade Chicken

  • 8 chicken thighs, deboned
  • 1 cup Soy Sauce
  • 1/4 cup Honey
  • 1/2 cup Mirin
  • 1/2 teaspoon Onion Powder
  • 1/2 teaspoonGarlic Powder
  • 1/2 teaspoon Cayanne Pepper
  • 1/4 tablespoon Salt
  • 1/4 tablespoon Pepper

Roasted Vegetables

  • 2 tomatoes
  • 1 bunch of Asparagus
  • olive oil
  • salt
  • pepper

[/tab]

[/tabs]

chicken-debone

Debone your chicken thighs with a pair of kitchen scissors and cut the bone away. Some people don’t like deboning but I just imagine it as biology class where you need to retrieve some item out of the carcass. Clearly I was an ace in High School biology.

chicken-soy

In a bowl, mix together the soy sauce, mirin, honey, cayanne pepper, onion powder, garlic powder, salt and pepper.

chicken-mirin

chicken-honey

braised-chicken-spices

braised-chicken-sit

Mix it all together until its well combined. Then, if you have time, leave it covered in the fridge for about an hour to marinate.

asparagus

Prepare the vegetables to be roasted. Wash it and remove the woody ends by bending it until it snaps. Drizzle olive oil over then and season with salt and pepper.

Preheat the oven to 350F and it will need about 15 minutes to be roasted.

braised-chicken-raw

Take the chicken into a pan and heat it up to medium heat.

braised-chicken-steam

I left it covered so it could retain more of the heat.

chicken-braised-cook

You will need 5 – 7 minutes on the first side, then 3 to 5 minutes on the second side, or until browned and cooked through.

chicken-braised

Chicken and vegetables all ready for dinner. The chicken would go really well with rice or quinoa, but I really felt like roasted vegetables today.

crabcake-salad

On the West Coast, we are fortunate to be so close to an array of seafood. Going out to get crab cakes can be expensive, so making it at home is cheap and easy. You don’t need to be spending time boiling and extracting the meat from a whole crab. I went to Costco for a container of crab meat. It was about $10, which isn’t too bad.

[tabs tab1=”Ingredients”]

[tab id=1]

  • 2 eggs
  • 5 tablespoons mayonnaise
  • 4 teaspoons lemon juice
  • 1 teaspoon paprika
  • 1/4 teaspoon garlic powder
  • 2 teaspoon dried tarragon
  • 2 tablespoon minced green onions
  • a can of crabmeat
  • 1 cup crushed buttery round crackers
  • 2 tablespoon butter

[/tab]

[/tabs]

  1. Combine the egg, mayonnaise, lemon juice, paprika, garlic powder, tarragon, and green onions.
  2. Whisk until well combined. Then add the crab meat.
  3. Take your round crackers and break them up into tiny crumbs.
  4. Add slowly until you have your desired consistency. I found my mixture to be quite wet, so I kept adding them in until it held more firmly together.
  5. Heat butter in a pan over medium heat.
  6. Form crab cake mixture into 8 small patties.
  7. Cook until golden brown, it might take about 5 minutes on each side. 

Very easy to make and these crab cakes were quite filling. M could barely finish 2 patties on his own. I spent about 30 minutes making them.

crabcake

chicken-brocolli-cheese-casserole

M had a lot of ingredients leftover from a previous dinner, so I had to find a dish that uses a fair amount of cheese. So, I thought about making Chicken Broccoli Casserole. I didn’t want to use a roux-based sauce because of all the cream and butter, so thickening chicken broth with flour seemed like the way to go.

It’s a tad healthier and you won’t be beating yourself up the next day for indulging on a lot of fat and dairy.

[tabs tab1=”Ingredients”]

[tab id=1]

  • 1/2 cup all-purpose flour
  • 4 cups low-sodium chicken broth
  • Salt and Pepper
  • 1 cup shredded sharp Cheddar
  • 1 onion, diced
  • 2 crowns of broccoli
  • 3 cups of white rice
  • 1 rotisserie chicken
  • 3/4 cup grated Parmesan

[/tab]

[/tabs]

  • Prepare your rice in the rice cooker while you prep the other ingredients. Rice takes the longest to prepare, so make sure you do that first.
  • Preheat your oven to 400 degrees Fahrenheit

chicken-brocolli-cheese-brocolli

  • Wash the broccoli crowns and cut them into smaller bite-size pieces

chicken-brocolli-cheese-chicken

  • Take the breast of the rotisserie chicken and shred it all up. You can then save the leftover meat for the next day. If you didn’t want to buy a whole rotisserie chicken, you can alternatively cook some chicken breast. I just find the rotisserie chicken easier and full of flavour.

chicken-brocolli-cheese-grate

  • Grate and prepare all the cheese you need

chicken-brocolli-cheese-cheeses

  • Then set it aside for use later on.

chicken-brocolli-cheese-onion

  • Saute onions until golden brown

chicken-brocolli-cheese-whisk

  • In a medium sauce pan, whisk the flour and chicken stock over medium heat

chicken-brocolli-cheese-thick

  • After a few minutes, you will see you sauce thickening up. You know it’s thick enough when it starts sticking onto your whisk.

chicken-brocolli-cheese-sauce

  • Dump in the chopped broccoli into the sauce until all the broccoli is evenly coated.

chicken-brocolli-cheeseing

  • In your casserole pan, put your cooked rice, shredded chicken breast, and sautéed onions.

chicken-brocolli-cheese-mix

  • Pour the broccoli and sauce mixture into the pan and mix all ingredients thoroughly.

chicken-brocolli-cheese-oventime

  • Once you have it mixed well, top it off with parmesan cheese. Then put it into the oven for 30 minutes.

chicken-brocolli-cheese

There you go, chicken and broccoli casserole! All made in under an hour.

corn-tomato-salad

My two favourite vegetables are corn and tomatoes. The great debate – are tomatoes really a vegetable? It has seeds so its a fruit. I don’t really care. They taste good and I could eat them all day long. As a snack, in a taco, or in a salad. I wanted to make Corn and Tomato Salad.

I wanted to make a quick salad with a few common ingredients around the kitchen. I don’t like making complicated items for dinner. Nobody has time for that especially when you get off work around 5 and have to scramble to get dinner on the table.

[tabs tab1=”Ingredients”]

[tab id=1]

Vinaigrette:

  • 2 tablespoons white wine vinegar
  • 1 tablespoon lemon juice
  • Salt and Pepper
  • Drizzle of extra-virgin olive oil

Salad:

  • 4 cobbs of corn
  • 2 cups of grape tomatoes, halved
  • Fresh mozzarella
  • 3 teaspoons green onion, thinly sliced
  • 5 basil leaves, chopped

[/tab]

[/tabs]

  1. Boil Corn Cobs in a pot of water until it is tender. Should take about 5 minutes.
  2. Slice off the corn kernels from the cobb into a large bowl.
  3. Mix in the sliced tomatoes, green onions, mozzarella bits and basil into the same large bowl.
  4. Pour the vinaigrette into the large bowl.
  5. Toss ingredients together.

This only took about 15 minutes to prepare. The longest part is really just waiting for the corn to cook. Alternatively, you could use canned corn niblets to make this in a few minutes.

Serve it with anything you like. We made crab cakes to accompany the Corn and Tomato Salad.

crabcake-salad

creamy-lychee-jello-set

Lychees are amazing, lychees are delicious, and lychees even make great desserts. Growing up in an asian family, we always have cans of lychees in the pantry or when they are in season, my parents would always get a bunch from the grocery store.

The fresh lychees would taste amazing, but its always a pain peeling them and spitting out the black pits. I’ve come pretty close to swallowing them, and trust me, it’s not fun.

Lychees aren’t grown in BC, but you can find them in asian grocery stores around June or July. You’ll know its in season when all the middle aged ladies start fighting over them. Most of them are imported from other countries. Otherwise, you can just find the canned lychees all year around.

creamy-lychee-jello-ingredients

[tabs tab1=”Ingredients”]

[tab id=1]

  • 1 can of Lychee in Syrup (Remember to save the syrup!)
  • 2 pouches of gelatine
  • 1.5 cup Cream
  • 1 cup Water
  • 1/4 cup Sugar

[/tab]

[/tabs]

creamy-lychee-jello-can

creamy-lychee-jello-lychee

Slice the lychees into four wedges, so they are more bite size. Remember to save the lychee syrup! Thats the good stuff.

creamy-lychee-jello-geletine

Next, heat up the gelatin, lychee syrup, sugar, water and cream in a pot on the stove. Mix until it is all nicely combined together.

creamy-lychee-jello-beakers

I’ve learned to love using breaker for cooking! It’s such a life saver and a lot less mess. Plus, they are meant to be heated to high temperatures so it won’t crack.

creamy-lychee-jello-pour

Place the lychee bits in the bottom of the cup and then add the liquid potion on top.

Once they are all filled up, leave it in the fridge until they have set. This can take about an hour or 2.

creamy-lychee-jello-ready

In the end, you’ll end up with these cups of creamy lychee pudding. I like to use the clear cups because you can see everything inside, plus when you see the lychee at the bottom of the cups, you’ll definitely want to dig in.

curry-katsu-pack

Japanese Curry starts off from blocks of curry roux from the supermarket. At least that how I do it. I picked this up at T&T and got the Golden Curry brand in Medium Hot. It saves a lot of time and it always tastes great!

I remember having this a lot as a child and it was so goooood. M loves it too, so having this for dinner was a no brainer.

It’s one of the most popular dishes in Japan and has 3 main components – curry sauce, rice and the pork cutlet. With prep and cooking time, this should take about 1 hour or less depending on how organized you are.

curry-katsu-ingredients

[tabs tab1=”Ingredients”]

[tab id=1]

Curry

  • Half a box of Curry Roux
  • 3.5 cups of water
  • 1 tablespoon olive oil
  • 1 red pepper, sliced
  • 7 mushrooms, sliced
  • 1 potato, into bite sized pieces
  • 1 onion, sliced
  • 1 carrot, into bite sized pieces

Pork Katsu

  • 1 egg
  • 2 pork chops
  • salt and pepper
  • Vegetable Oil
  • Panko breading

Cooked Rice

  • 3 cups of Rice
  • 6 cups of water

[/tab]

[/tabs]

Before you do any prep, make sure you start cooking the rice first as it needs time to cook. It can take anywhere from 30 minutes to 45 minutes depending on how much rice you cook. For M and myself, we just made 3 cups of rice. I like to make a little bit extra so I have leftovers for next days lunch.

curry-katsu-veg

Heat a tablespoon of olive oil in a large pot. Then, dump the onions, carrots, peppers and potatoes into the pot.

curry-katsu-blocks

Once the vegetables soften up a bit, add the 3.5 cups of water and half the box of curry roux. Mix well until the roux dissolves. Cook for an additional 15 minutes until sauce has thickened.

curry-katsu-dredge

To make the pork katsu, you need to tenderize the pork first. I didn’t have a mallet, so I used a larger dull knife and pounded at the meat. When you don’t have the tools you need, just find another alternative.

Once you have your tenderized pork cutlets, dip them into the egg to coat the outside, and then into the panko crust and throughly cover it.

curry-katsu-coating

This is what it should look like.

curry-katsu-fry

Take a frying pan and add enough oil to cover the bottom of the pan. Heat it at medium high. Once the oil is hot enough, put in the cutlets.
Cook until each side is nice and golden brown.

curry-katsu-dish

To make the rice into the rounded shape, just take a small bowl and fill it with rice, then you just flip it over onto the plate. Scoop the curry around the rice. Then put the golden crisp pork cutlet on top. I used black sesame as a garnish to make the rice a bit more beautiful.

Voila! Katsu curry done at home!

coconut-chicken-done

Instead of frozen chicken strips from the freezer, it’s always fun to make your own chicken strips. M really wanted to make some coconut chicken strips from a adapted recipe from his coworker.

[tabs tab1=”Ingredients”]

[tab id=1]

4 boneless and skinless chicken breasts

Marinade:

  • 1 egg
  • ¼ cup hoisin sauce
  • ⅛ tsp cayenne pepper

Coating:

  • 1 cup of sweetened shredded coconut
  • Salt
  • Pepper

[/tab]

[/tabs]

coconut-chicken-coco

You start by taken your sweetened shredded coconut and put it into a medium heat pan.

coconut-chicken-toastec

Cook until it has lightly browned. You may want to stir it once in a while if your pan has uneven heating.

coconut-chicken-wet

To create the marinade for the chicken breasts, mix together an egg, hoisin sauce and cayenne pepper.

coconut-chicken-slice

We got 4 boneless chicken breasts and sliced them up. We cut them into thirds.

coconut-chicken-dip

Once you have the chicken sliced, coat the strips into the marinade and then toss it in the toasted shredded coconut, salt and pepper.

coconut-chicken-bake

Into the oven it goes for about 15 minutes in the preheated oven (350ºF or 176ºC).

coconut-chicken-done

Voila, it’s done. You can serve the coconut chicken strips as a snack or for dinner by just adding a salad.
It was very simple to make and you didn’t have to buy a lot of ingredients. M and I really like making dinner with the least ingredients possible so nothing expires and goes wasted.