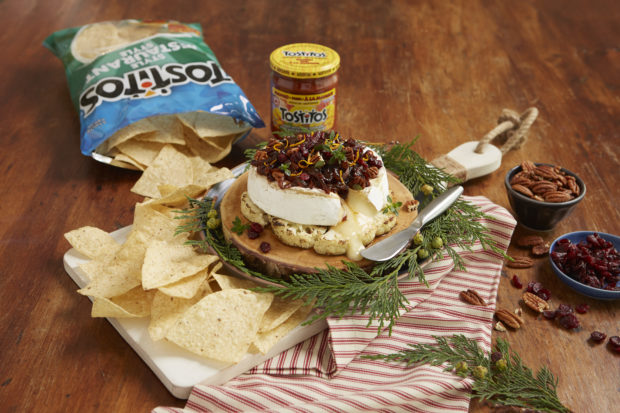
The holidays is just around the corner and Tostitos make a regular appearance in our household when we are entertaining guests. It’s a party classic.
Matt Basile is a Canadian chef and bestselling cookbook author, and the founder of Toronto street food brand, Fidel Gastro’s. As the 2021 Tostitos ambassador, Matt has created effortless recipes, which require minimal time in the kitchen, but deliver on flavour and crunch. Check out these recipes and it’s got us drooling.
Holiday Baked Brie The holiday dish that’s a little sweet, a little cheesy, a little crunchy and a lot tasty!
Nacho Average Brunch Spice up your morning with this folded omelette-quesadilla – it’s nacho average brunch.
Poke Bites Make any night a little fancier with these easy Tostitos® Scoops!® tortilla chips poke bites.
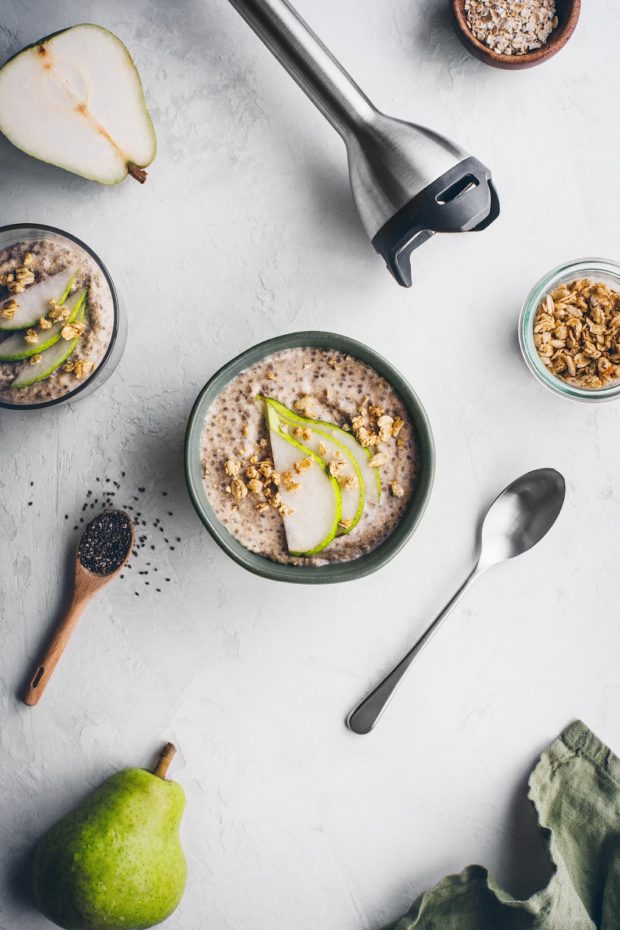
We absolutely adore our Vitamix. It’s a great appliance to have in the kitchen especially during the holidays to make drinks, dishes, and desserts. Check out these festive recipes to make for your next family meal.
With naturally-soothing lemon and honey, this hot beverage features notes of cinnamon and ginger. Add a strip of lemon peel and a cinnamon stick for a beautifully-garnished cocktail.
This creamy mashed cauliflower recipe is a delicious healthier alternative to mashed potatoes with just roasted cauliflower, homemade cashew milk, salt, and pepper.
A great saucy style custard without all the dairy and eggs. Great served with granola, or just topped with fresh fruit and eaten as a yogurt alternative.
Caffeine lovers rejoyce, there is more to Nespresso than just a cup of coffee straight from the capsules. Here are 3 fun and festive ideas for your guests or yourself.
The festive capsulescollection includes:
Forest Black (Original and Vertuo)
Forest Almond Flavour (Original and Vertuo)
Forest Fruit Flavour (Original and Vertuo)
Ginerbread (Vertuo)
The Festive collection of capsules not only brings the gift of quality coffee, it also gives back to the Canadian forest as well; this holiday season, Nespresso has pledged $100,000 to Tree Canada.
It is a ubiquitous drink, seen in Canadians’ hands at any time of the day, no matter the weather, no matter the occasion.
But as popular and beloved as coffee is, it can also be improved with the right concoction. When marking National Coffee Day on September 29th — and International Coffee Day on October 1st — warm up hot coffee with some Irish Whiskey, and make refreshing coffee cocktails easy with Jameson Cold Brew.
Jameson’s triple distilled smoothness is a perfect pair with the richness of coffee. Made from 100 per cent Arabica beans from Brazil and Colombia, Jameson Cold Brew is an ideal drink, whether sipped neat, poured over ice or as an ingredient in a cocktail.
Celebrate National Coffee Day with some of these tasty cocktails:
Jameson Cold Brew on the Rocks
Simple, yet elegant and delicious. Put two or three big ice cubes in a rocks glass, pour in 1 ounce of Jameson Cold Brew and enjoy!
Jameson Cold Brew with Tonic
Fill a large tumbler with ice, then add 1 ounce of Jameson Cold Brew and fill the glass with tonic. Garnish with a lime wedge.
Jameson Cold Brewtini
A classic with a Cold Brew twist. In a mixing glass with ice, stir 1 ½ ounces of Jameson Cold Brew to 1 ounce of cold brew coffee and a ½ ounce simple syrup. Strain into a chilled cocktail glass.
Jameson Knight Rider
A perfect pick me up that is ideal for coffee lovers. In a cocktail mixer, pour 2 ounces of Jameson Cold Brew, 1 ounce Kahlua, 4 ounces of cold brew coffee and three dashes of chocolate bitters. Shake and strain into a rocks glass filled with ice.
Jameson Cold Brew has intense coffee-bean aromatics, with chocolate, caramel and vanilla nuttiness, complemented by subtle hints of tobacco and roasted coffee notes. On the palate, it is a perfectly balanced combination of smooth Jameson Irish whiskey and natural cold brew coffee. It’s a mellow mouthfeel with notes of toasted oak and dark chocolate. The finish is smooth and dry, lingering on the palate.
Día de Los Muertos, or Day of the Dead, is one of the most lively and colourful celebrations in Mexico. This holiday takes place between November 1st and 2nd is a festive celebration of loved ones who have passed on and as with any party, food and drink play a major role.
Dos Equis (brewed in Mexico since 1897) has partnered with Mexican-Canadian Chef Paula Zavala to help you plan your own Day of the Dead celebration by preparing some of the very best and auténtico recipes for your readers. These delicious are bites pair perfectly with the authentic taste of Mexico found in a refreshing Dos Equis.
Looking for a modern take on a classic Mexican favourite? Try Ceviche De Coliflor (Cauliflower Ceviche).
Need a savoury starter beyond your typical salsa and guacamole? Try making a spicy Choriqueso dip.
The countdown is on for Day of the Dead in Mexico! This collection of delicious Day of the Dead food recipes is sure to inspire you to host your own Día de Los Muertos gathering for family and friends.
DOS EQUIS CHORIQUESO
Ingredients:
1 Lb. Manchengo Cheese, shredded
1 Lb. Spanish Dried Chorizo
12 Small Flour tortillas
3 Tbsp Dos Equis beer
1 jar Salsa Macha (optional)
Recipe Step-By-Step:
Peel and thinly slice the chorizo. Heat up a medium cast iron pan, add the chorizo slices and cook until they release the grease. Remove the chorizo and leave the grease in the pan.
Place the shredded cheese in the pan covering all the surfaces, add the chorizo on top and the beer. Cover the pan, lower the heat and wait until the cheese is melted, do not stir! Or place the pan into a 350F oven for 10 minutes.
Warm up the tortillas and immediately serve the tacos with the melted cheese.
Optional, add some salsa macha on top.
CEVICHE DE COLIFLOR (CAULIFLOWER CEVICHE)
Ingredients:
1 Cauliflower head, washed and florets finely chopped
2 medium tomatoes finely chopped
1 medium red onion finely chopped
100 gr fresh cilantro chopped
1 or 2 fresh jalapeño chilis chopped
1 carrot, shredded
Juice of 4 limes
1 Tbsp Olive oil
Salt to taste
Pinch of pepper
1 avocado
Tortilla chips
Tools:
1 medium bowl
1 large spoon
1 nice bowl for ceviche
1 nice bowl for tortilla chips
Bowls for mise en place
Recipe Step-By-Step:
In a medium bowl combine the onion, jalapeno, lime juice, salt and olive oil, marinade for 5 minutes.
Chop the cauliflower very finely and add to the bowl as well as the rest of the ingredients except the avocado. Chill for 10 minutes. Season to taste
Have ceviche in a bowl topped with slices of avocado and spicy salsa. Served with a bowl of tortilla chips.
As the Official Canadian Vodka of the Toronto Blue Jays, Polar Ice wants to ensure Canadians from coast-to-coast can take part in a new game day experience! Together, a new signature cocktail – the Polar Leadoff – has been created for fans to cheer on the Jays’ as they push for their spot in this year’s playoffs.
The Polar Leadoff
1 oz Polar Ice Vodka
1/4 oz blue curaçao
4-5 oz sparkling lemonade
Build in a tall glass with lots of ice. Top with popcorn
Just as hot as Vladdy’s bat, the new cocktail hits it out of the park, bringing a taste of the Rogers Centre to fans through its captivating blue hue and iconic popcorn topper. Fans can pick up a limited edition Polar Ice bottle at their nearest liquor store, while supplies last.
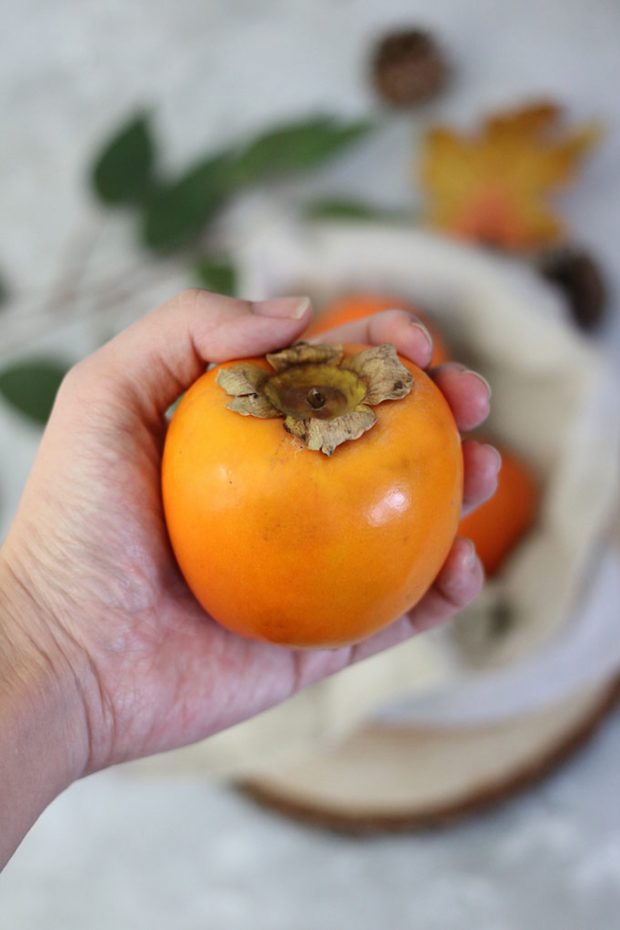
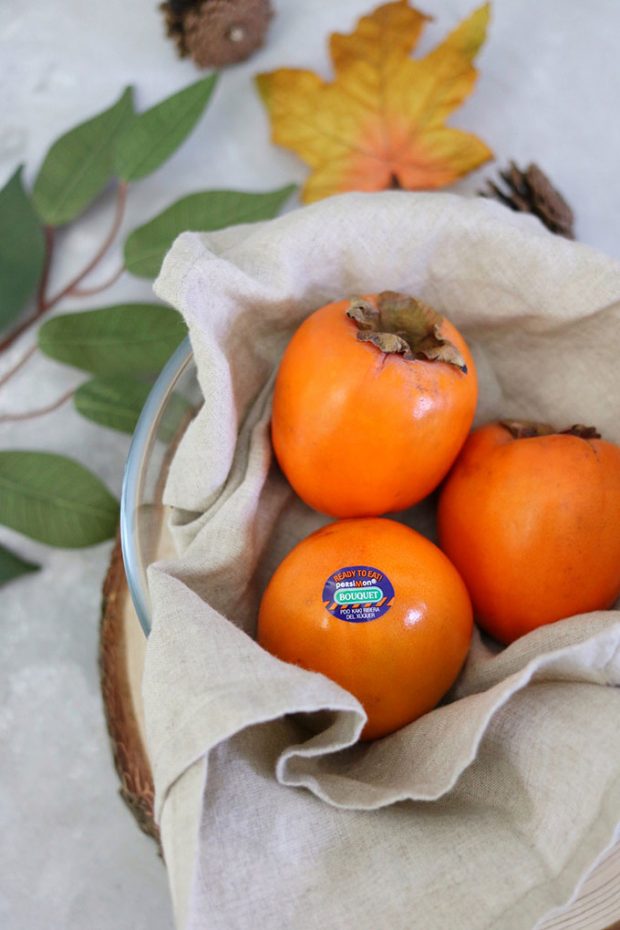
I love this time of year since persimmons are in season. We have partnered up with persiMon®, a brand of persimmons originating from the heart of the Ribera Del Xuquer Valley in Spain. This beautifully bright orange fruit is available between November and January and you don’t want to miss out on it.
persiMon® are firm and naturally ripened and ready to eat as is. It’s also a perfect ingredient in many dishes. I personally love to keep the natural state of the fruit to let the flavours shine. It is sweet, delicate mango and peach flavour, seedless flesh, and distinctive star cross-section. Keep an eye out for freckles as it’s a sign of extra sweetness.
The ones I had did have freckles and were so so delicious.
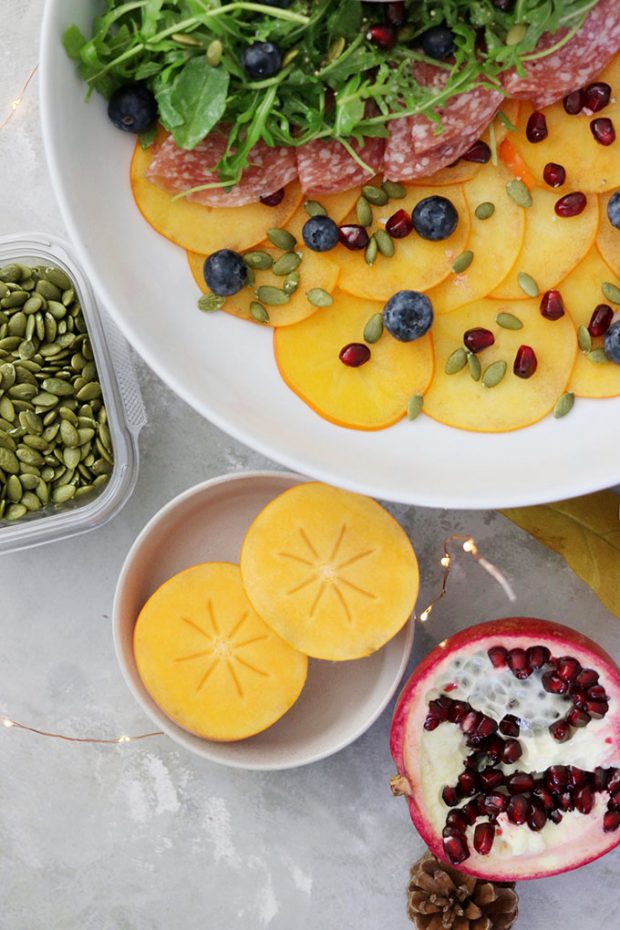
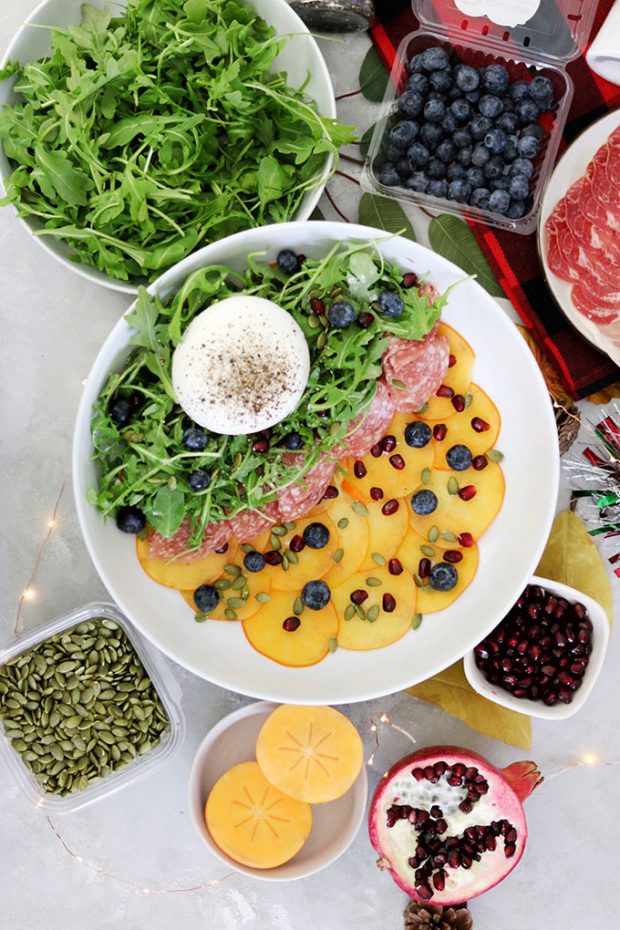
I’ve had persimmons since I was a little kid and it would be a delight eating it with my family. For this year, we have put together a shared appetizer – Festive Persimmon Carpaccio with Burrata and Arugula Salad for the family. There’s no need to cook any ingredients and the flavours and textures pair so well together.
You get the bitterness from the arugula, sweetness from the persimmons, creaminess from the burrata, saltiness from the Caesar dressing and the salami. Plus, the textures from the pomegranate and pumpkins seeds. I really loved it, so here is the recipes below.
Festive Persimmon Carpaccio with Burrata and Arugula Salad
Serving Size: 4
Ingredients:
2 pieces of persiMon®, sliced
1 whole Burrata
1 handful of Arugula
A few Pomegranate
A few Blueberries
8 slices of Genoa salami
1 tbsp Caesar Salad Dressing
A few pumpkin seeds
Salt + black pepper to taste
Directions:
Use a mandoline to slice up the persimmon thinly. Alternatively, you can use a very sharp knife, but be careful about your fingers.
In a separate bowl, lightly dress your arugula in Caesar salad dressing.
Open up the pomegranate and remove the arils inside.
Assemble on a plate by placing the persimmons first. Add the handful of dressed arugula on one side of the plate, then add the burrata on top. Fold the Genoa salami and place just under the arugula.
Garnish with pumpkins seeds, blueberries, pomegranate arils, salt, and pepper.
Eat and enjoy!
Where to Find persiMon® in Vancouver
persiMon® comes from the heart of the Ribera Del Xuquer Valley in Spain and is now available in Vancouver at IGA and Safeway stores in mid-December.
When you’re looking for persimmons be sure to opt for the persiMon® brand, they are the only persimmon brand certified by Protected Designation of Origin.
This blog post was sponsored by persiMon® but the opinions are all my own.
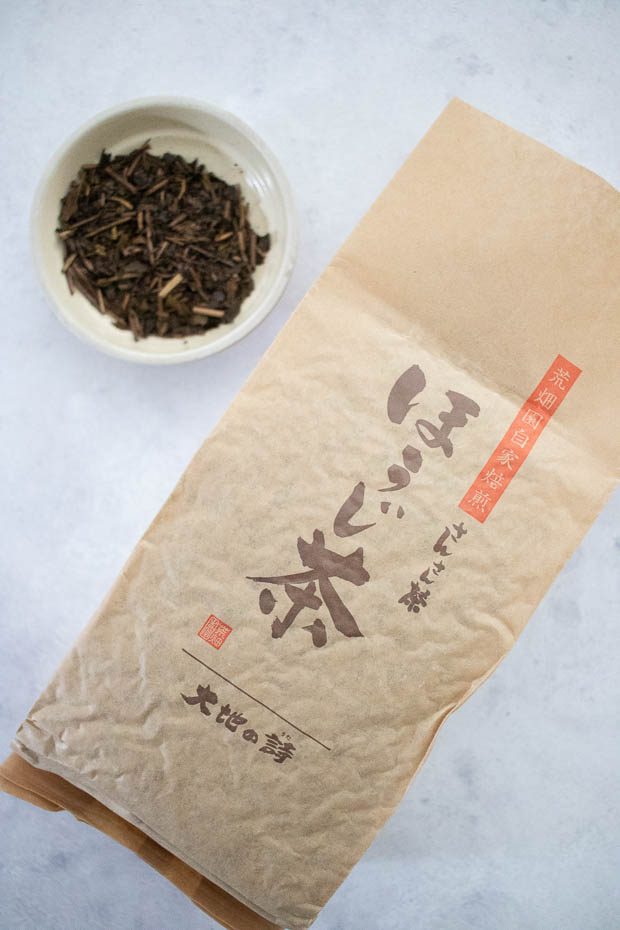
The best way to enjoy Japanese Green Tea is steeping it in hot water and drinking it. Sometimes, it’s fun to get a little creative in the kitchen, so when a packaged arrived from Japanese Green Tea Company with Issaku, Matcha, and Hojicha tea leaves, I wanted to try something new.
I absolutely adore tea! Coming from a Chinese family, tea is integral to all dining experiences and there is always a pot of tea to aid in digestion. I had a lot of tea like oolong and jasmine growing up. When I had green tea at a Japanese restaurant, I instantly loved it. As I grew older, discovering a wide variety of green tea really opened my eyes to how delicate yet versatile this tea can be.
I just steep my tea in hot water and sip away most of the time. Occasionally, I enjoy being a bit fancy. Below are some different ways of using Issaku, Matcha, and Hojicha tea leaves from Japanese Green Tea Company.
Japanese Green Tea Company is the only US-based company to source tea directly from Arahataen Green Tea Farms in Shizuoka, Japan. Shizuoka has been the centre of green tea cultivation in Japan for centuries, and the region’s intense sunlight and intermittent fog gives each batch of tea its distinctive flavour.
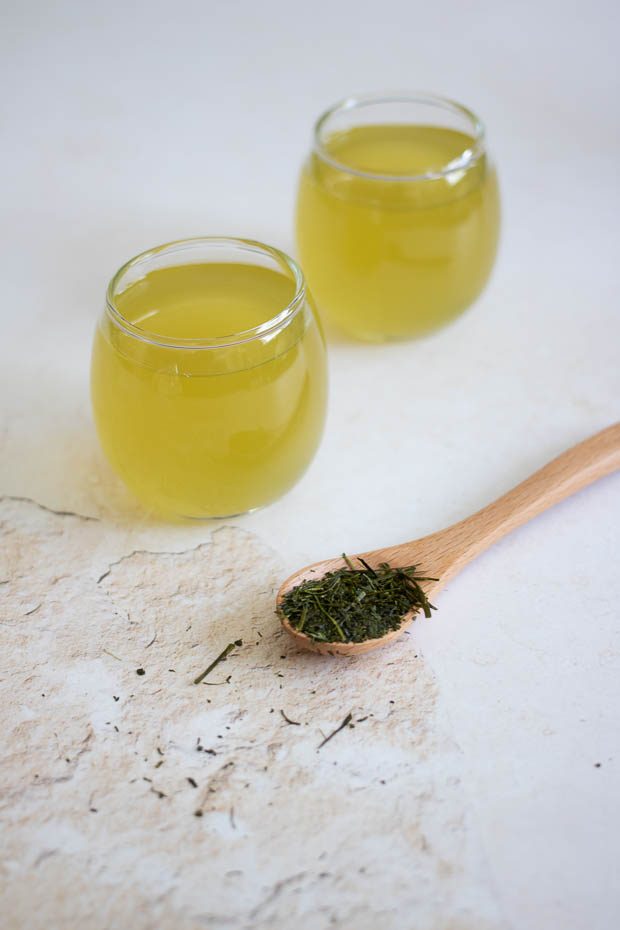
Issaku Cold Brew Green Tea
Issaku is the highest-grade tea available from Arahataen Green Tea Farm and due to the complex and long process of creating the tea, only a limited quantity is available to produce every year. This was a winner at the Global Tea Championship in 2017.
One way to enjoy this tea is turning it into a cold brew.
1. Use 3-4 teaspoons of tea 2. Dissolve in 30oz of hot water 3. Refrigerate for 3 hours 4. Stir tea, strain and serve cold
Cold brewing Issaku gives the tea a slight sweet taste and removes a bit of bitterness. It was strong but very enjoyable on a hot summers day. You probably didn’t think you could cold brew tea right? Most people talk about cold brew coffee, but yes, cold brew tea is a thing.
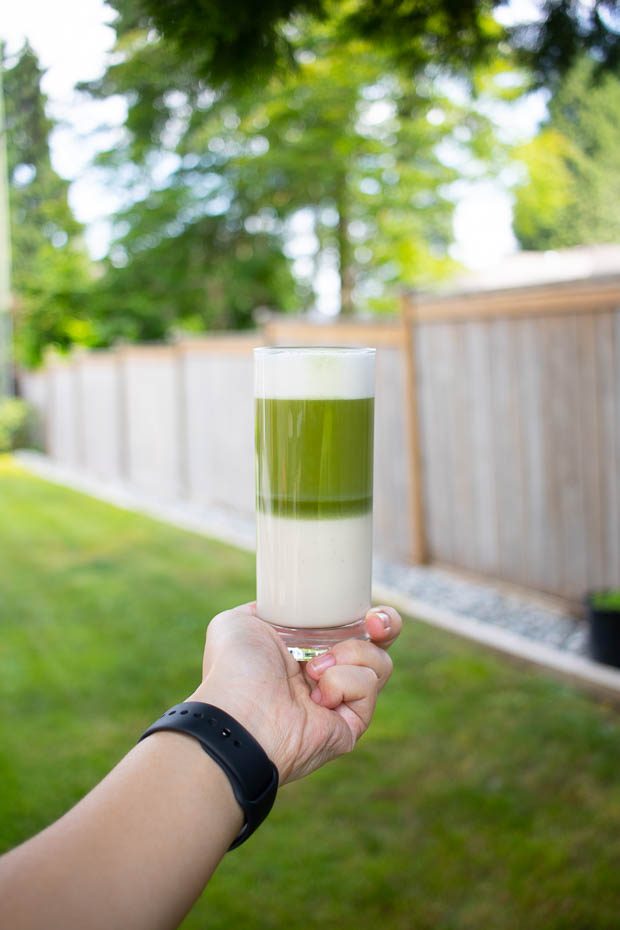
Hojicha Layered Latte
I absolutely adore their hojicha. Hojicha is roasted green tea and has lower caffeine and less bitter than other tea. I’ve had hojicha is a lot of different desserts, but making a latte out of these loose leaves if my favourite.
Steep 2 teaspoons of hojicha in 1 cup of hot water for 1 -2 minutes.
Froth 130ml of milk with a teaspoon of liquid sugar.
Pour milk and honey mixture in a tall glass.
Slowly pour your hojicha tea to create the layers in the latte.
The roasted flavour of hojicha mixed with the warm frothed milk really feels like a warm hug to me. One of my favourite drinks to make and easily impress any guests.
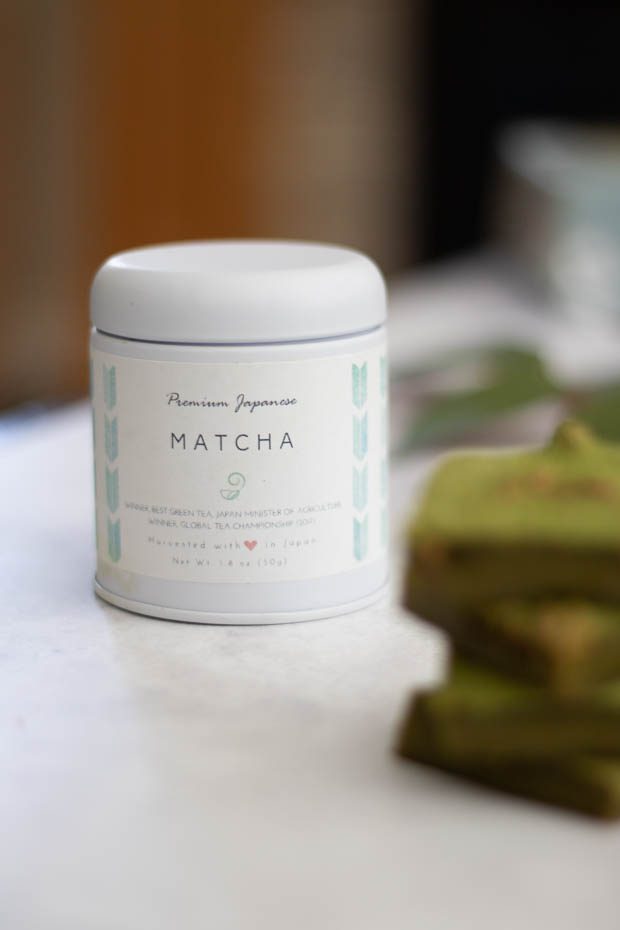
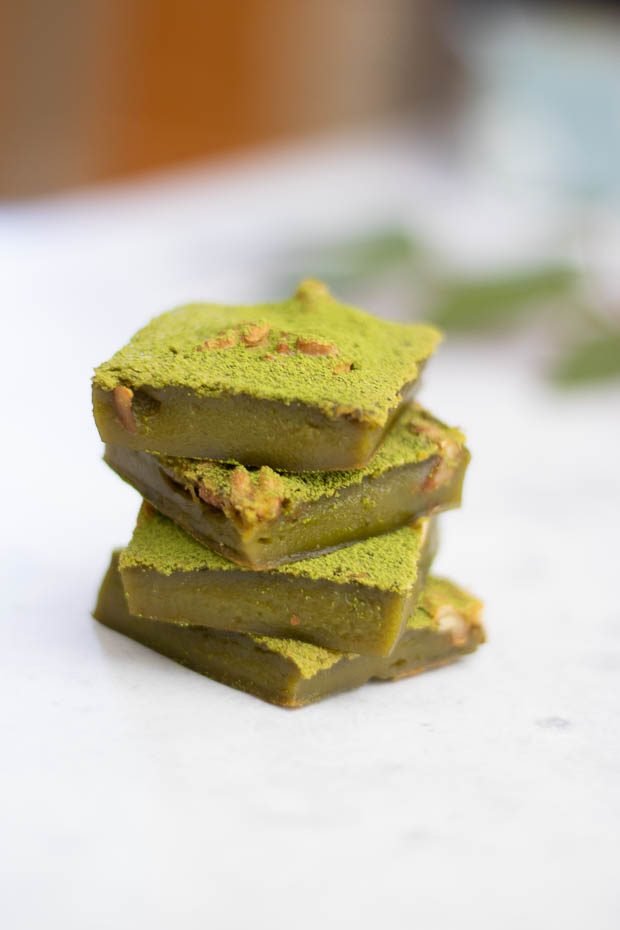
Matcha Brownie Mochi
Matcha is Japanese Powdered Green Tea. The green tea leaves are allowed to dry, stems and veins are removed from the leaves, and then the tea is ground into a fine powder. A lot of people drink it hot or drink it cold, but baking with matcha is pretty amazing too.
My friend Michelle from Sift and Simmer has a great recipe for Matcha Brownie Mochi. She also has other great ideas for using matcha too. All you need is matcha, glutinous rice flour, and some other kitchen basics.
Final Thoughts
I really enjoyed all 3 teas – Issaku, Matcha, and Hojicha and it came in the mail very quickly. Japanese Green Tea Company is located in Portland, Oregon but they distribute and sell tea in North America, so you don’t need to fly to Japan to get authentic green tea.
Of the 3 teas, I enjoyed Hojicha the most as it’s pretty hard to find where we live. Plus, the price point is great for the amount of leave your receive.
If you’re interested in Japanese Green Tea, Japanese Green Tea Company is a wealth of knowledge and also sells amazing varieties of green tea, which I highly recommend.
If you’re at home hosting a few people over or even just having a fun evening with the kids, why not get creative in the kitchen and make your own frozen yogurt at home?
Some high power blenders like the Vitamix have a frozen dessert preset, so it creates items like ice cream and frozen yogurt a breeze.
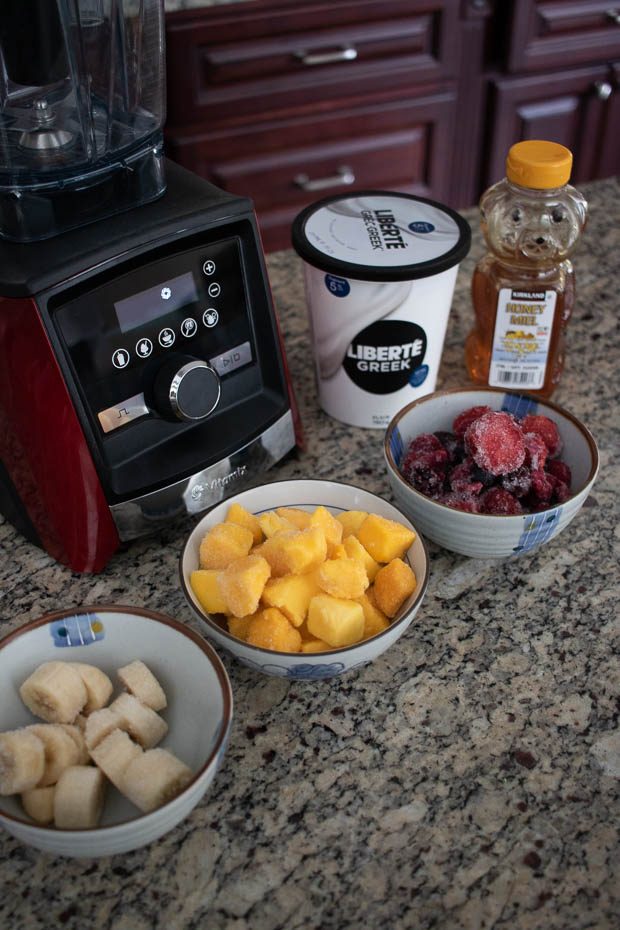
We took this and decided to make 2 frozen yogurt treats – mango frozen yogurt and mixed berry frozen yogurt. With very similar ingredients, we were able to have a wide range of flavours to cater to different people’s flavour preferences by swapping out the fruit.
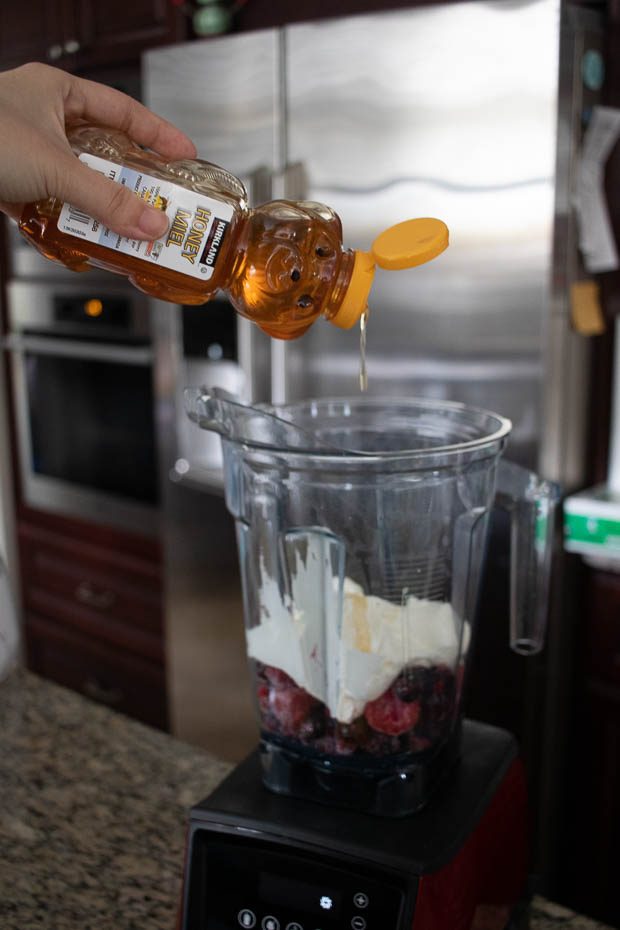
All you need are a few ingredients – fruit, yogurt, and honey to create frozen yogurt in seconds. The honey is used to add a touch of sweetness depending on what yogurt and fruit you choose.
I like the use of frozen fruits as they are picked at the peak of ripeness so you never have to worry about the quality. Also, saves you time from chopping and freezing them.
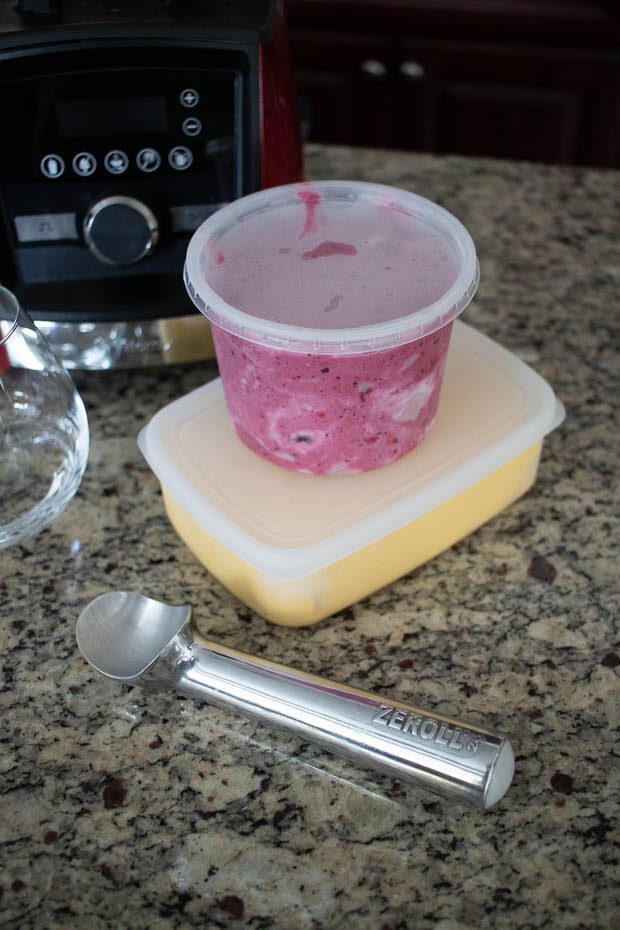
Once you blend everything up, you can serve it straight from the blender, or you can store them in tupperware containers for them to firm up a little bit more in the freezer and serve at a later time.
The Frozen Yogurt Station is fun and interactive. Plus, there is no mystery to what’s inside your frozen yogurt.
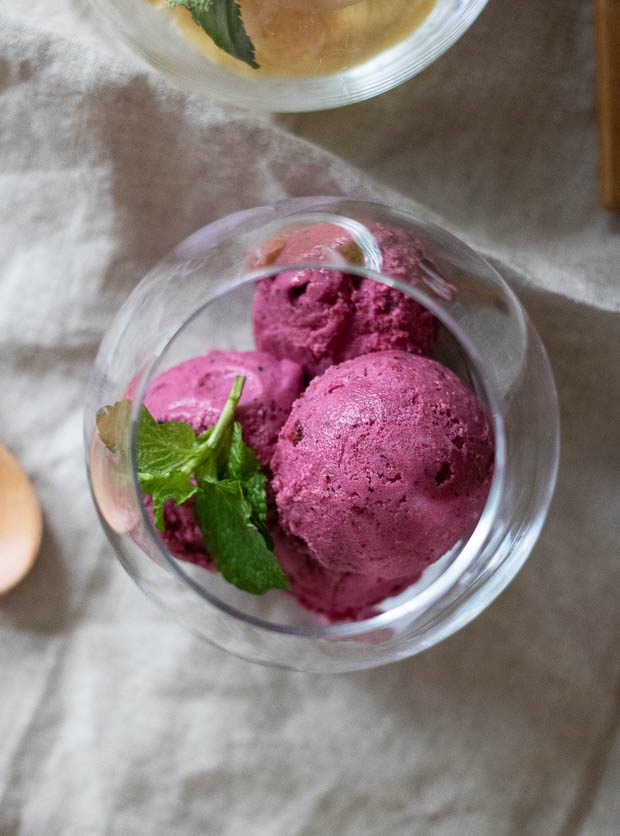
Mixed Berry Frozen Yogurt
Serves 2
Ingredients:
1 cup frozen mixed berries
1.5 cups of 2% Greek Yogurt
2 tablespoons of honey
Directions:
Add mixed berries, yogurt, and honey into a high powered blender.
Blend for 30s – 1 minute on high to get it all blended nice and smooth.
Scoop into bowls or cones.
Enjoy.
Mango Frozen Yogurt
Serves: 2
Ingredients:
1 cup frozen mango
1.5 cups of 2% Greek Yogurt
2 tablespoons of honey
Directions:
Add mango, yogurt, and honey into a high powered blender.
Blend for 30s – 1 minute on high to get it all blended nice and smooth.
Scoop into bowls or cones.
Enjoy.
Well, there you have it, frozen yogurt made at home with only 3 ingredients and very easy to make in a high power blender. So easy that you can create a frozen yogurt bar at home in a breeze.
I really enjoyed making it with the family and they had a blast.
We were gifted a Vitamix Ascent A3500 for use in creating this blog post, but all opinions are our own.
Being a new mom, having time to prepare and eat nutritious meals has been a challenge as taking care of Baby E has us always on our toes. A lot of families with new borns just don’t have the energy to cook a full meal for a little while. A lot of my friends with kids rely on other family members cooking for them, getting take out, or making frozen meals.
There are some quick ways to meal prep nutritious meals to get in the vitamins you need for the day. Two of the most common items to make in a Vitamix blender are smoothies and soups. As being a high performance blender, it does an amazing job at making smoothies, hot soups, dips & spreads, as well as frozen desserts.
Here are 2 of our favourite ways to make smoothies and soups much quicker with these short cuts while using a Vitamix blender.
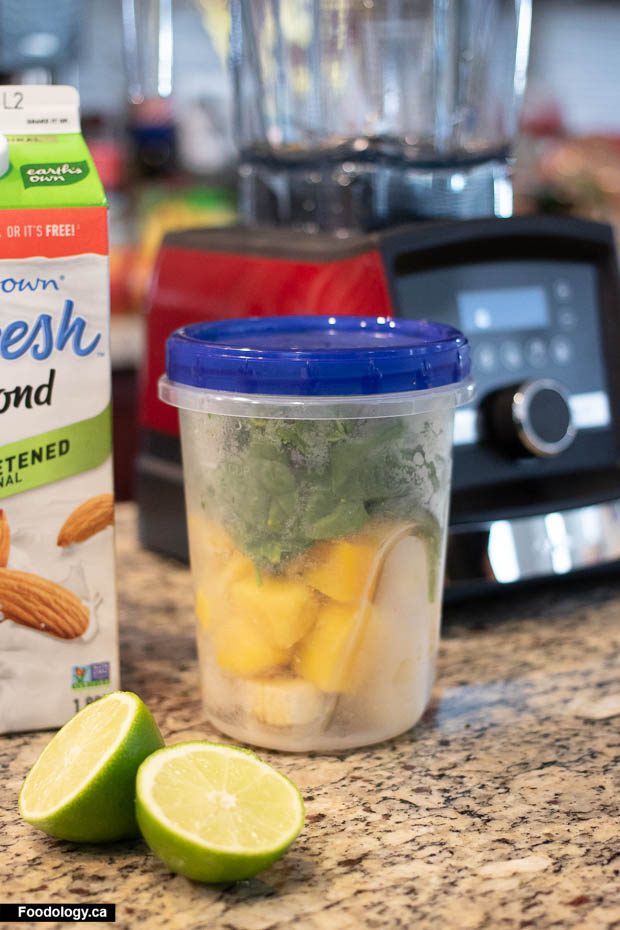
Portion Out Smoothie Ingredients for Quick Blending
Buying fresh produce can go bad quickly if you lose track of what’s in your fridge and when certain items expire. What our family likes to do is to portion out smoothie ingredients into containers and freeze them. You can make the same smoothie for the week or mix and match the items that go into each one.
When it’s time to make a quick smoothie, all you need to do is dump the container of ingredients and pour in your favourite liquids like almond milk.
Kale Ginger Smoothie
Ginger is an ingredient that is known to keep your blood flowing, warm your extremities, and keep away the chills. During postpartum, I had a lot of ginger because with all the blood loss from giving birth, I was cold and pale for the first 2 weeks.
Serves 2
Ingredients:
1 Tbsp fresh ginger, skin removed
1 1/2 cups chopped frozen mango
1 small ripe frozen banana
1 large handful spinach
1 small handful kale
1/2 medium lime, juiced
1/3 cup light coconut milk
2/3 cup unsweetened plain almond milk
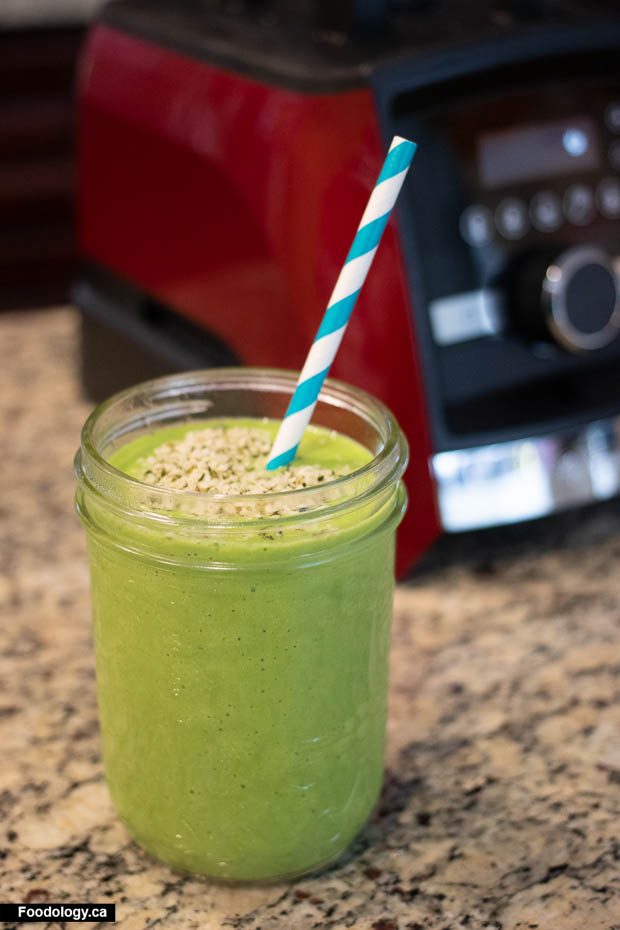
1 Tbsp raw hulled hemp seeds (optional)
Instructions:
In a container, freeze ginger, mango, banana, spinach, and kale ahead of time.
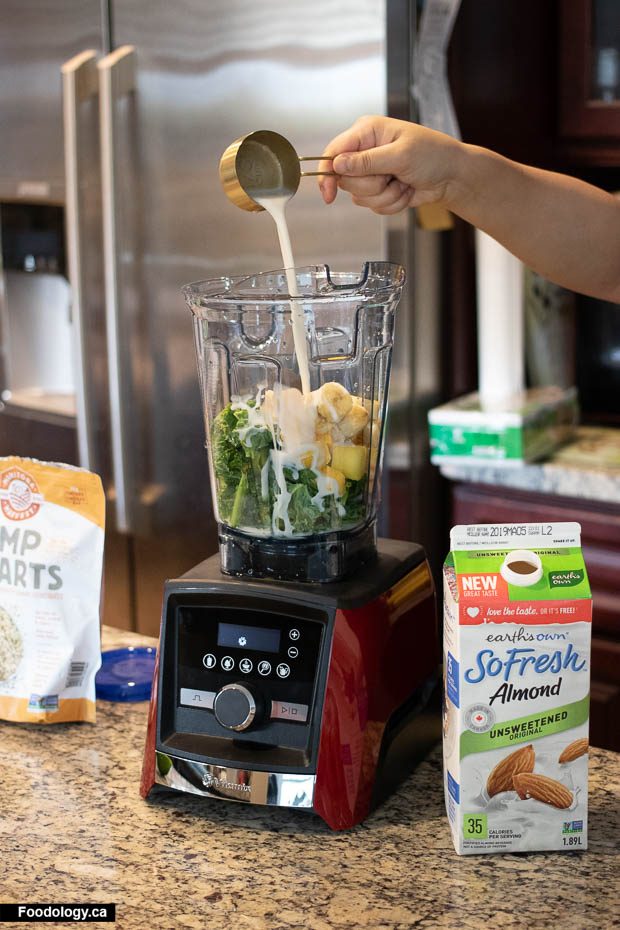
Add almond milk, lime juice, light coconut milk, and the ingredients in the frozen container into a high powered blender.
Blend for 1 – 2 minutes on high to get it all blended nice and smoothly.
Pour smoothie into a cup and top with hemp seeds.
Enjoy.
Prepare Soup in a Blender and Freeze leftovers for the Future
Nausea doesn’t just happen in your first trimester, it can happen postpartum as well when all your hormones are trying to settle back to normal but new mom’s bodies go through quite a bit of change hormonally to adjust to life without a baby inside their belly.
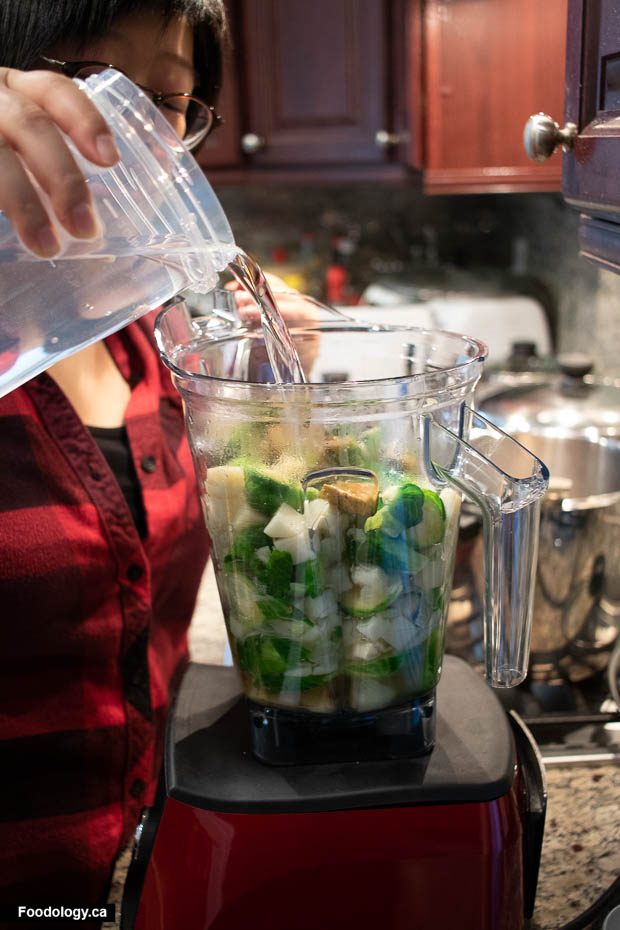
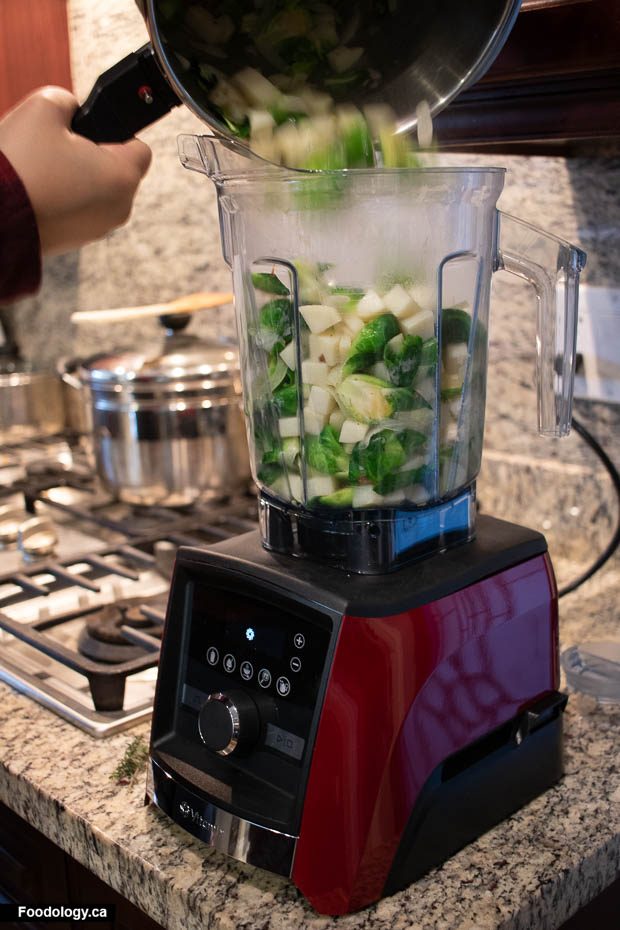
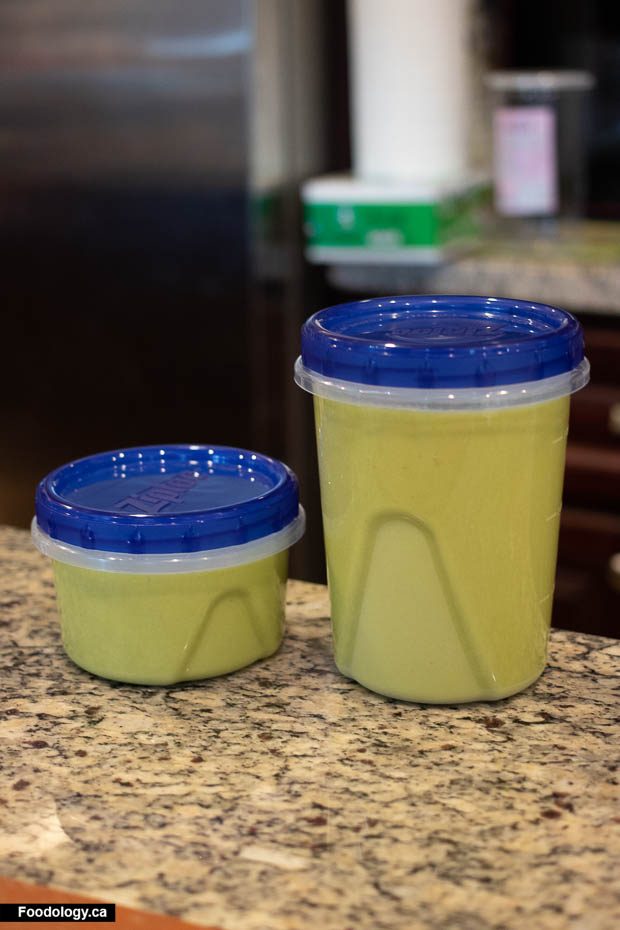
If it’s yourself making the soup or someone else, it is a lifesaver to have some frozen in the fridge for a quick meal as it can last 4 to 6 months. You just need to defrost and heat it up. Also, to cut down on dishes, you can make the soup in a blender. The friction of the Vitamix blades can make steaming-hot soup in under 10 minutes, right in the container with less mess.
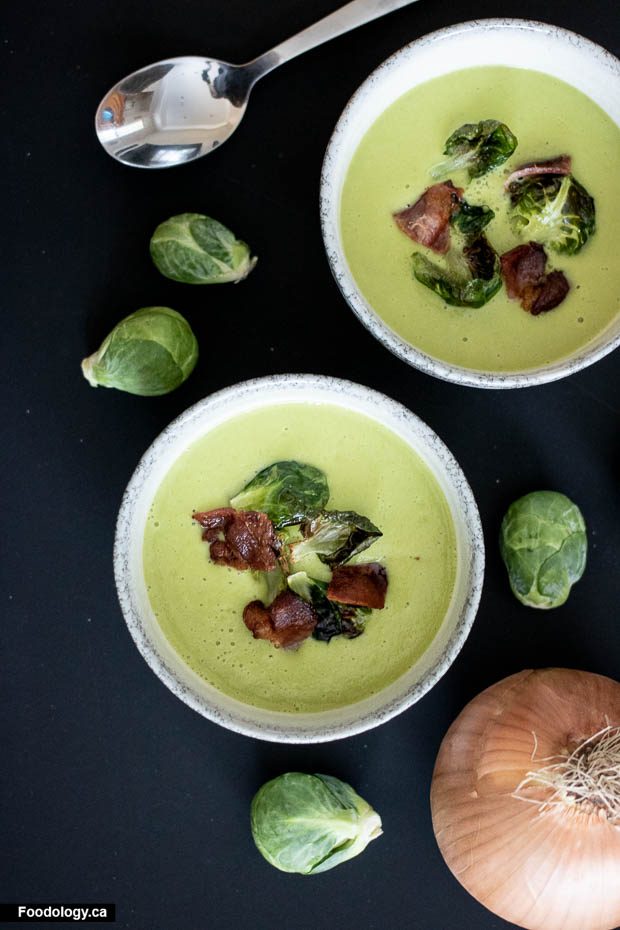
Creamy Brussel Sprout Soup with Bacon
Serves 4-6
Ingredients:
8 slices of thick cut bacon
1 small onion, chopped
300g Brussel sprouts, halved
1 large potato, peel and cut into cubes
2 garlic cloves, chopped
2 thyme twigs
4 cups of chicken broth
Salt and Pepper
Instructions:
Cook bacon in a frying pan or oven until crisp. Follow instruction on the package. Let cool and cut into bite-sized pieces, then set aside.
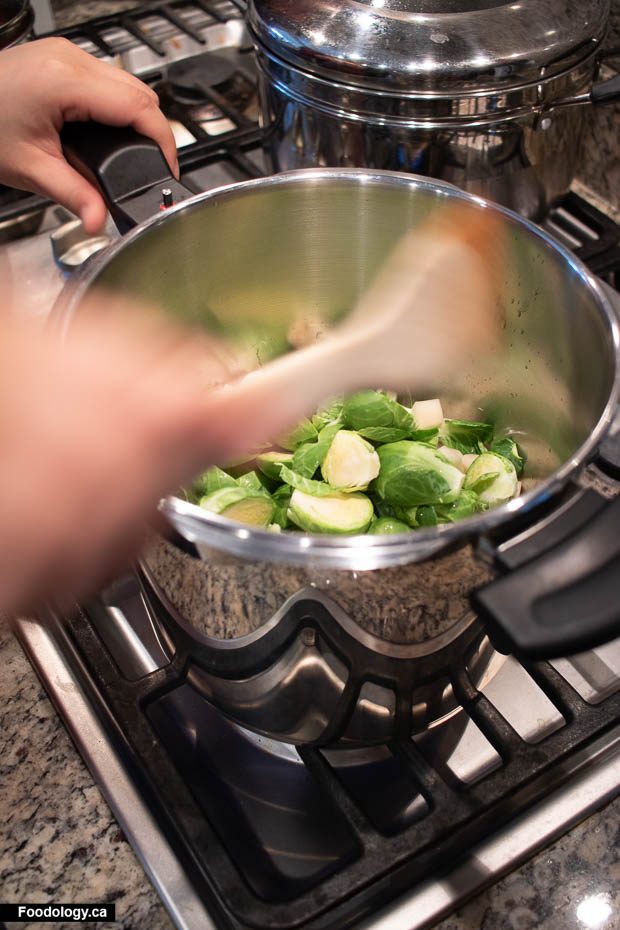
Add onion, Brussel sprouts, potatoes, garlic, thyme, salt and pepper into a pot on medium high heat to cook until veggies soften.
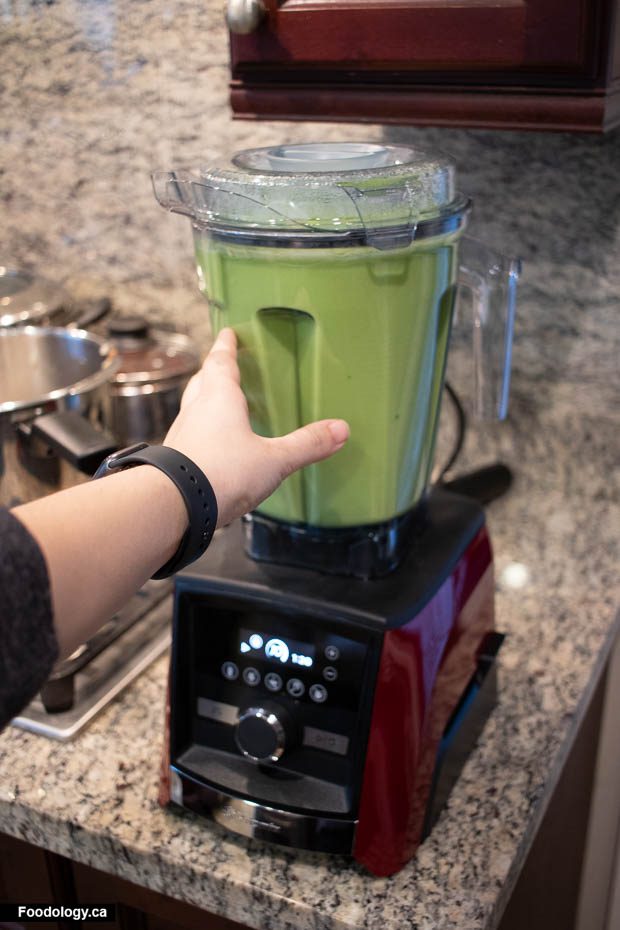
In a blender, add the cooked veggies, 2 tablespoons of fat from bacon, and chicken broth. Blend the soup on high for 10 minutes until the soup is smooth and piping hot.
Serve and top it with bacon bits and Brussel Sprout leaves.
Tips for Freezing Soup
Let soup cool before freezing. To speed up the process, you can put it in an ice bath.
Don’t full up containers to the top. Leave 1 inch to give the soup room to expand and limit contact with the air, which may cause freezer burn.
There you have it, 2 quick items to make in a Vitamix blender to make a quick smoothie and soup for new mothers who are already super busy taking care of a newborn. Any time saved can be used to tend to boding with the newborn baby.
We were gifted a Vitamix Ascent A3500 for use in creating this blog post, but all opinions are our own.
With the holidays, I am sure you have lots of potlucks and perhaps even hosting people in your home. Since there is so much to do, here is a quick appetizer to put together that is simple and will easily wow your friends and family.
For myself, juggling work, a social life, a food blog, and a little baby on the way, it really doesn’t leave me much time to cook up a storm, so I love making things that have few ingredients and takes 30 minutes or less.
We avoid ordering take out for our family gatherings as we like to make everything at home. It just makes everything a bit more homey and made with love.
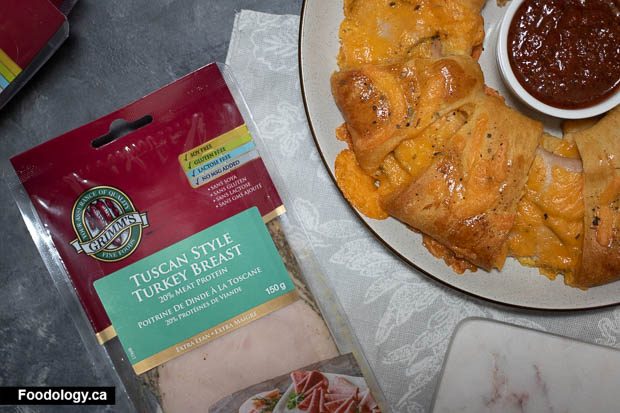
When Grimm’s Fine Foods sent us a variety of sliced meats and cheeses, I knew I had to make a baked pastry ring since I’ve always wanted to make and eat one. They are from Langley, BC and specialize in offering high quality meat products, cheeses, tortillas, wraps and other snacks. Grimm’s Fine Foods has been around since 1951 and their integrity and commitment to quality never wavered. You can find their products at local grocers and retailers like Buy-Low Foods, Costco, Sobeys, IGA Marketplace, Save on Foods, and many others.
Grimm’s Fine Foods has been very active in the community and is always looking for ways to give back. They let us choose a charity of our choice for them to donate $500 worth of product to a food bank or charity of our choice. I chose the Union Gospel Mission as they work hard to provide meals, education, shelter, safe and affordable housing, drug and alcohol recovery programs, and support services to those struggling with homelessness and addiction in the Metro Vancouver area and city of Mission.
[tabs tab1=”Easy Baked Turkey and Cheese Pastry Ring” ]
[tab id=1]
Serves 4-6
Ingredients:
1 can of crescent roll dough (8 rolls)
1 pack of Grimm’s Fine Foods Tuscan Style Turkey Breast (150g)
1 pack of Grimm’s Fine Foods Medium Cheddar Cheese, shredded (170g)
2 tablespoons of dijon mustard
Egg wash (1 egg and a table spoon of water combined and mixed)
Pinch of salt and pepper
0.5 cup of marinara sauce
Pinch of Italian seasoning (optional)
Directions:
Preheat the oven till 350˚F.
Prepare crescent roll dough and separate into individual triangles.
Place a small bowl in the centre and arrange the triangular crescent roll dough in a ring around the bowl. Make sure the dough overlaps and has a 2 inch area to put ingredients on top.
Spread dijon mustard on the crescent roll dough and layer with turkey breast slices and shredded cheddar cheese.
Flip the sharp corner of the triangle until you can tuck it under the bottom of the dough and repeat until all triangles are folded.
Apply your egg wash, salt + pepper and Italian seasoning on top of the pastry ring.
Bake for 30 minutes until golden brown.
Serve with marinara sauce in a bowl in the centre of the pastry ring and enjoy.
[/tab] [/tabs]
With similar ingredients, you can also make ham and cheese pinwheels too with a quick swaps of a few ingredients. Since I grabbed a few more items from the store, I thought I might as well give this a try too.
[tabs tab1=”Easy Baked Ham and Cheese Pinwheels” ]
[tab id=1]
Makes 12 pieces
Ingredients:
1 sheet of puff pastry, defrosted
1 pack of Grimm’s Fine Foods Black Forest Ham (150g)
1 pack of Grimm’s Fine Foods Medium Cheddar Cheese, shredded (170g)
4 tablespoons of dijon mustard
Directions:
Preheat the oven till 350˚F.
Unroll puff pastry sheet.
Spread a thin layer of dijon mustard on puff pastry
Add shredded cheese and black forest ham on top.
Roll into a tight log.
Cut into 1cm discs
Bake for 20 minutes until golden brown.
Serve and enjoy.
[/tab] [/tabs]
Enjoy these two recipes as it will give you more time to spend with friends and family rather than slaving away in the kitchen. Happy Holidays from the Foodology family.
This blog post was sponsored by Grimm’s Fine Foods but the opinions are all my own.
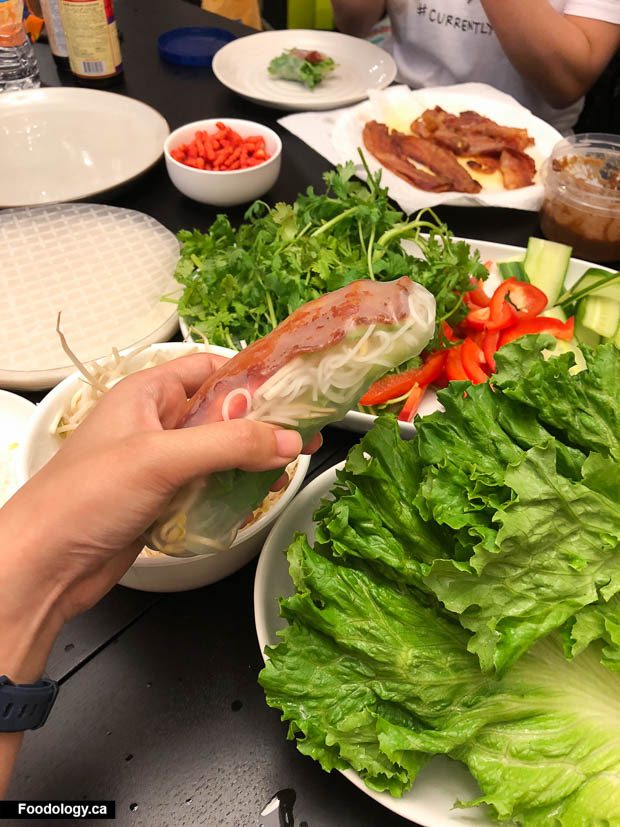
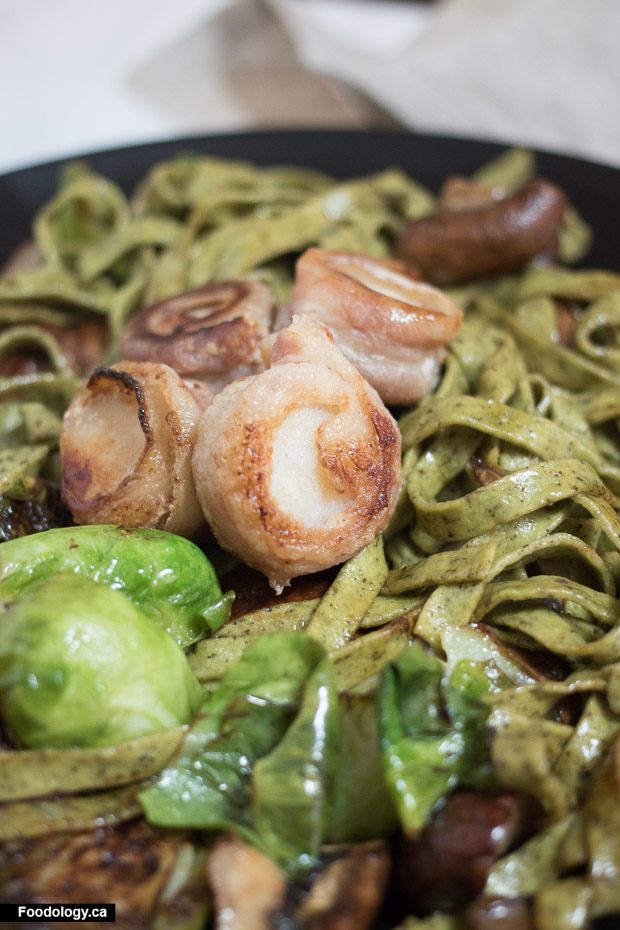
The best dinners are those that are interactive and surrounded by friends. My friend was telling me about how her coworkers were adding in bacon for their twist on Vietnamese Rice Roll wraps. It sounded like a great idea, so we decided to make it at my place for our usual Saturday night hangouts. Mostly it was healthy, but its up to you to control your bacon intake. hahaha. Sadly, I have no self control.
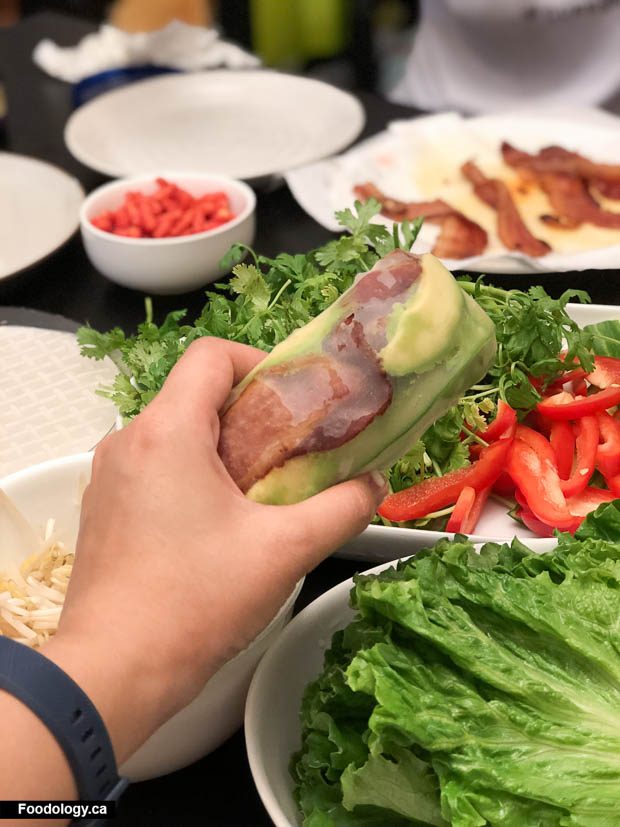
What I love about this is that it’s just minimal prep work and then you get a fun meal out of it. If you have kids, they will definitely enjoy putting their meal together. Plus, who doesn’t love bacon? You just need the rice rolls and then you can get creative with whatever ingredients you want inside. You can do all julienned veggies and bacon or you can add some vermicelli noodles like we did to balance it all out.
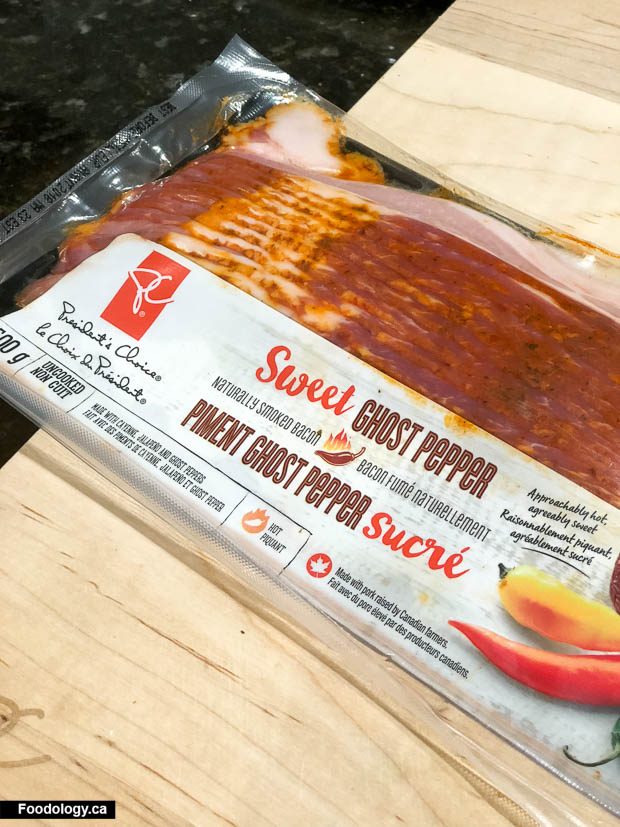
I like my bacon crispy so we got different types of bacon and cooked them in the oven as we prepared the rest of the ingredients. My favourite was the Sweet Ghost Pepper Bacon from President’s Choice as it added a kick of flavour.
Off into the over it goes. We had so much bacon that it barely fit on my cookie sheets. Once you have everything ready, it’s time to get the dinner started! I love that no matter what ingredient combination that you have in the rice roll, it tastes very fresh.
[tabs tab1=”DIY Bacon Rice Wraps”]
[tab id=1]
Makes enough for 4 people
Ingredients
1 package of rice paper
1 package of bacon (or 2 if you really love bacon.)
Green Leaf Lettuce
Vermicelli noodles
1 Avocado
2 Red Peppers
1 Cucumber
1 bunch Cilantro
Bean Sprouts
Directions
Cook bacon as per package instructions and set aside. Best if bacon is crisp.
Place a pot of water on the stove and bring to a boil. Boil rice vermicelli noodles as per package instructions. Drain noodles and run cold water over the noodles. Drain as much waster as possible and set aside.
Clean and slice red peppers and cucumbers in long julienne strips.
You need to wet the rice paper before wrapping. We have a shallow bowl with hot water to dip them in for half a second.
Add in your ingredients and roll it up like a burrito.
Eat and enjoy.
Tip: You can also add some hoisin sauce, or sriracha, or peanut sauce to go with the rice rolls for added taste.
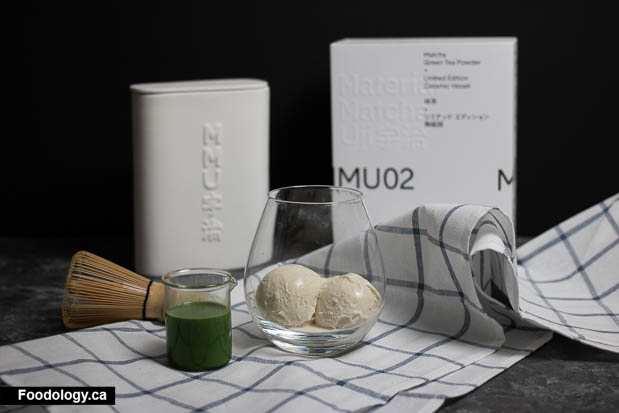
This is a Japanese twist to a classic Italian Affogato, which is a scoop of ice cream with a shot of espresso. I thought to myself, what would happen if I substituted it with matcha instead of espresso? I got a delivery of Material Matcha Uji MU02, which is high quality smooth blend of Samidori and Okumidori matcha. To get your own, you can use promo code “DIANAFOODMMU10” for 10% off their site. It’s always handy to have some matcha around for making desserts, or making drinks. You’ll know it’s high quality matcha when it’s nice green and vibrant.
With the combination of the matcha and ice cream, it really make it taste like an ice matcha latte or matcha ice cream.
[tabs tab1=”Matcha Affogato” ]
[tab id=1]
Makes 1 serving
Ingredients:
1-2 scoops Vanilla bean ice cream
2 teaspoons Matcha powder
60ml Warm water
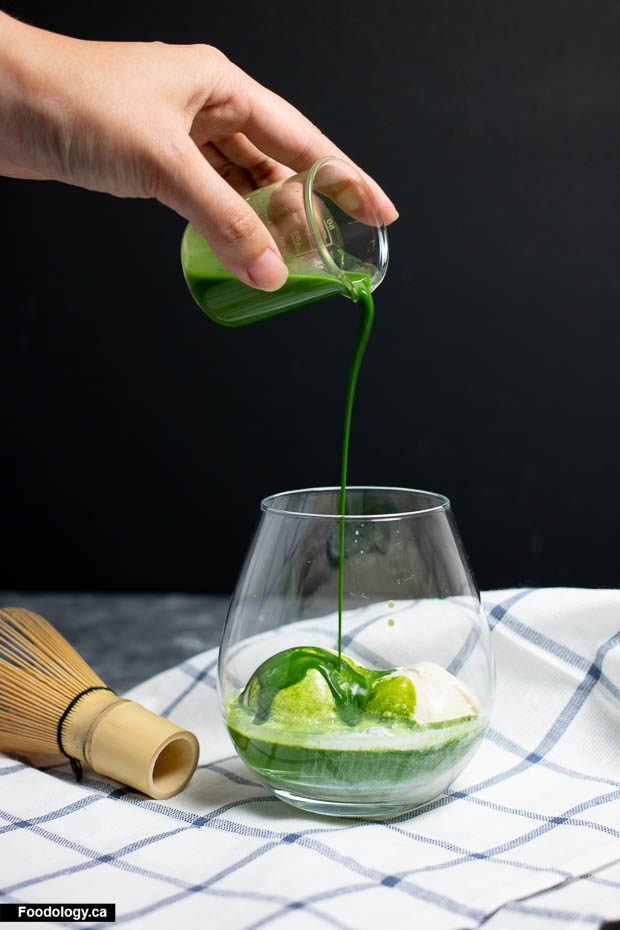
Directions:
In a small bowl, mix matcha and warm water with a chasen (wooden matcha whisk) and whisk in a zig zag motion to make it frothy. Once mixture is well combined, set aside.
Scoop ice cream into a bowl and then pour the matcha mixture over top.
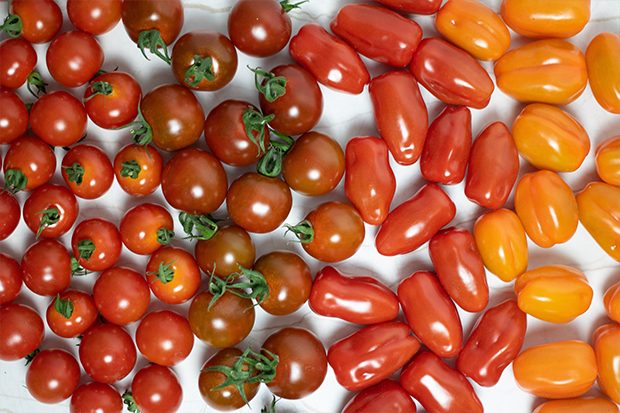
One of the many staples in my pantry are tomatoes and grains. You’ll always see them in my kitchen since they’re very versatile and great in so many different dishes. I try my best to purchase local BC veggies whenever possible as it adds super fresh colour and nutrients to the meal.
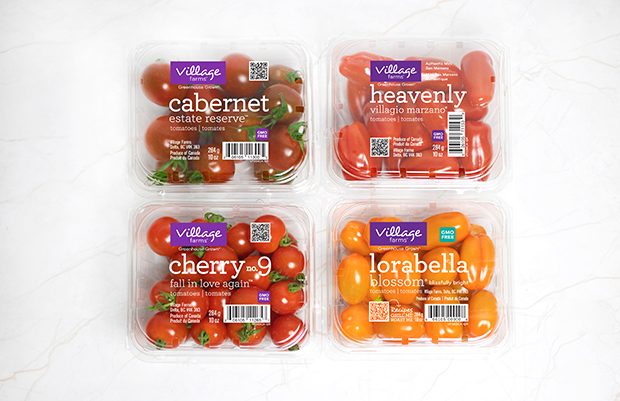
Lorabella Blossom® is bright orange and plump, full of sweet flavour, making it great right out of the box as a snack. Probably the sweetest out of the line up in my opinion. If you’ve never had an orange tomato before, you’ll want to try this variety.
Cabernet Estate Reserve® is easily identifiable by its rich dark crimson colour, round shape and green stem. It is a great tomato if you want a beautiful presentation. It has a milder flavour, not as sweet as the Lorabella Blossom®, but would work well for roasting or incorporating in a sauce.
Cherry No. 9 Fall in Love Again® is similar to the Cabernet Estate Reserve® but it is smaller and vibrant in colour. You can incorporate this in salads where you eat the cherry tomatoes whole to keep the juicy fresh and sweet flavours intact. When you bite into this, there is a refreshing snap when you chew down.
Heavenly Villagio Marzano® is best known for its slightly elongated shape. It’s one of the most readily available tomatoes in the produce aisle in British Columbia. I use it a lot in making salads.
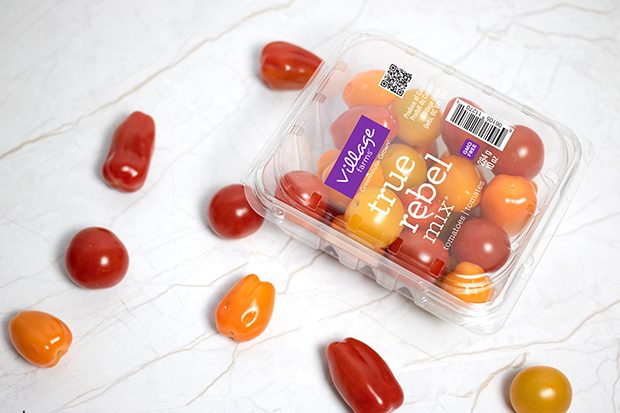
True Rebel Mix ® is stunning and contains a variety of cherry and grape tomatoes in each carton. There are different shapes, colours and slight flavour profiles that work together in harmony. It’s a great way to see and taste tomatoes that you might not normally choose.
BC Greenhouse Veggie Days are here this week and you can even visit a few greenhouses to meet local growers and see local produce being grown like cucumbers, pepper, and lettuce.
With Village Farms as one of 42 greenhouse growers in the Lower Mainland, you can feel proud that this produce was grown right in British Columbia by people like Leesa who just might be your neighbour!
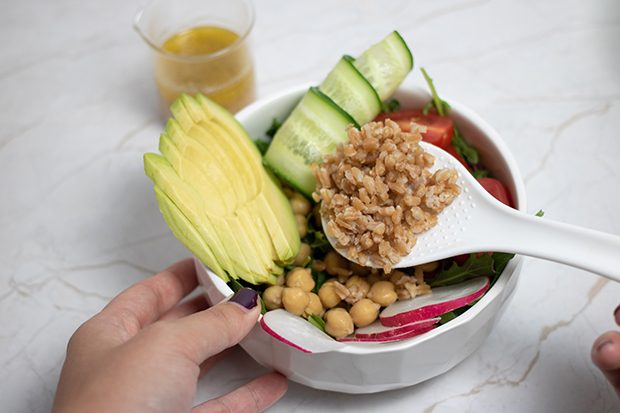
From the assortment of amazing local tomatoes I decided to make a Farro Grain Bowl using the Village Farms Heavenly Villagio Marzano® tomatoes in celebration of BC Veggie Days.
Farro is an ancient grain with a nutty earthy flavour with good texture that would pair well with vegetables to add more bite. This grain is high in fiber, iron, magnesium and protein, which make it nutritious and great in any dish.
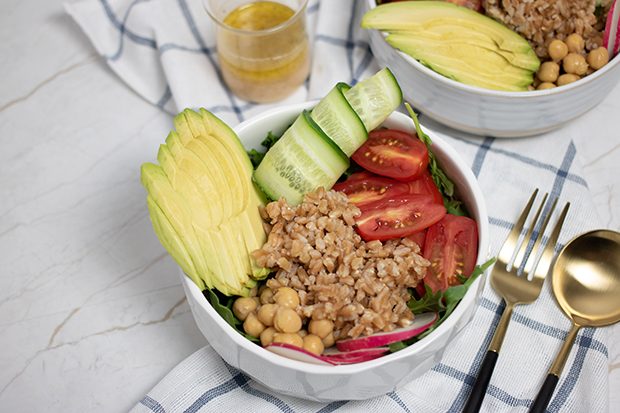
Check out this beautiful Farro grain bowl for a taste of Spring.
[tabs tab1=”Farro Grain Bowl”]
[tab id=1]
Makes 2 bowls
Ready in 15 minutes
Ingredients:
1 cup uncooked Farro, rinsed
½ Cucumber, sliced
½ cup Village Farms Heavenly Villagio Marzano® tomatoes
1 cup Chickpeas
1 cup Arugula
½ Avocado, sliced
1 Round Radish, sliced
2 tablespoon Red Vinegar
3 tablespoon Olive Oil
2 tablespoon Lemon Juice
5 teaspoon Dijon Mustard
Pinch of Salt and Pepper
Directions:
Rinse and drain farro. Place in pot and all 3 cups of water. Bring to a boil, reduce heat to medium and simmer for about 30 minutes. Drain any excess water. Let cool to room temperature.
Start with a base of arugula in a bowl. Add farro, cucumber, chickpeas, round radishes, avocado, and Village Farms Heavenly Villagio Marzano®
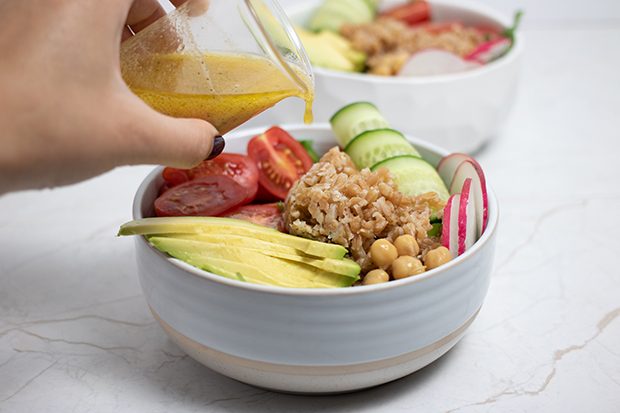
In a bowl, combine red wine vinegar, olive oil, lemon juice, Dijon mustard, salt and pepper.
Pour dressing on top of bowl and enjoy.
[/tab]
[/tabs]
This blog post was sponsored by Village Farms but the opinions are all my own.
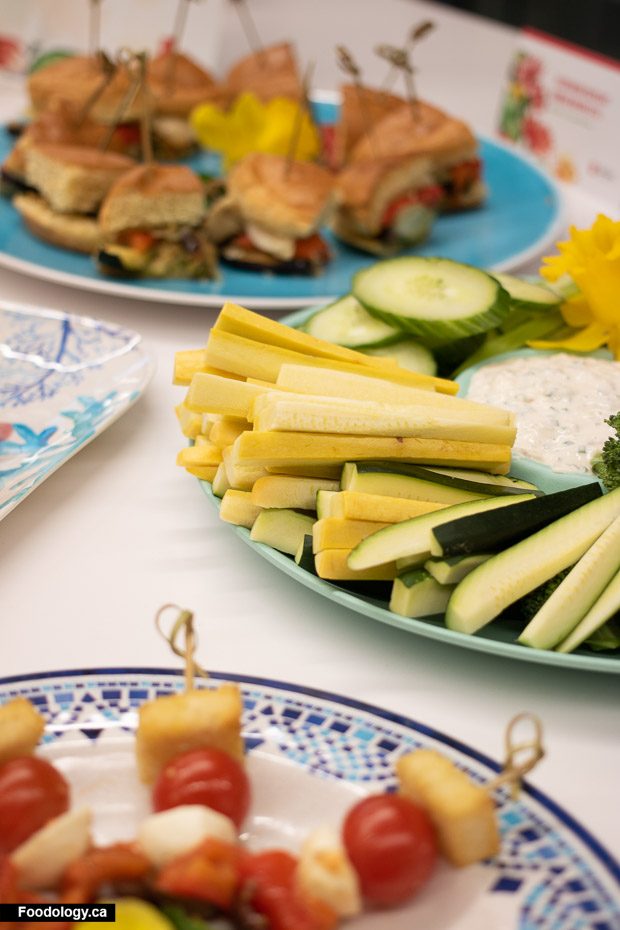
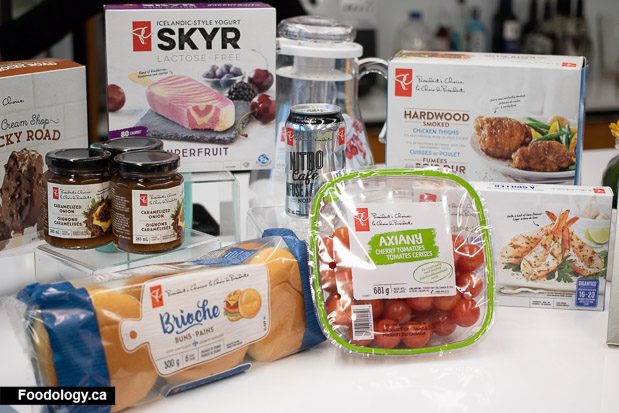
Trying to figure out what to make for a Summer party is challenging, but President’s Choice is making it easier with a few recipes that will impress your friends and family. They have launched their newest PC Insiders Collection with a few key items that can elevate your party spread. Here are 4 recipes that are quick to put together – Vegetarian Eggplant Brioche Muffulettas, Triple Creamy Onion Dip, Garlic Herb Shrimp and Pesto Crostini, and Maple Chia Fresca.
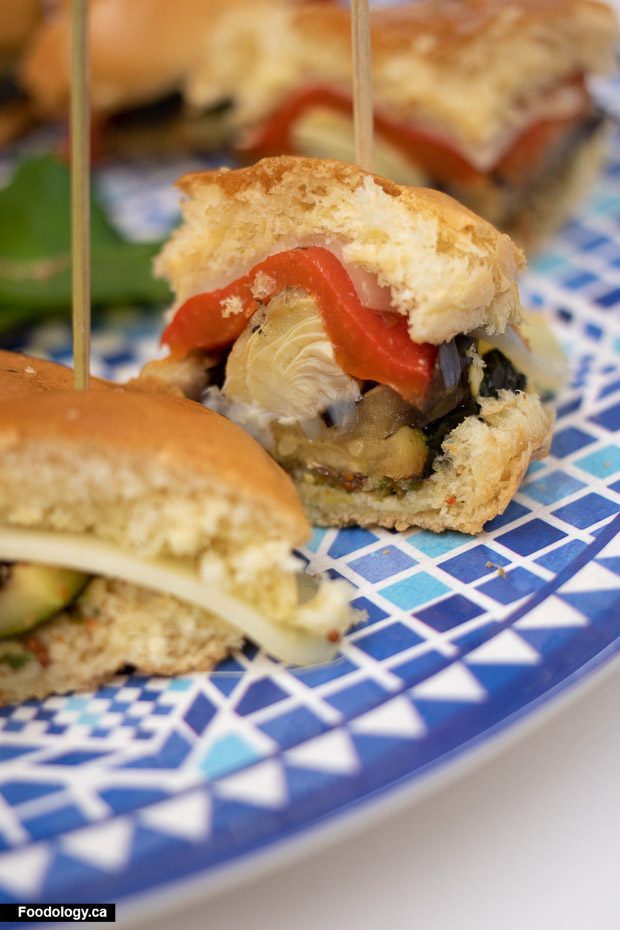
Vegetarian Eggplant Brioche Muffulettas
Thin layers of tender grilled eggplant and zucchini stand in for the cold cuts traditionally found in this classic New Orleans sandwich. The trick to making the perfect muffuletta is letting the sandwich rest after it’s assembled – this gives the bread a chance to soak up the juices from the olive spread.
2 zucchini, halved crosswise and sliced lengthwise into 1/2-inch (1 cm) thick strips
1 Italian (purple) eggplant, cut into 1/2-inch (1 cm) thick rounds
3 tbsp (45 mL) olive oil
1/2 tsp (2 mL) hot pepper flakes
1/4 tsp (1 mL) salt
1 batch Green Olive Spread (see recipe, below)
1 pkg (300 g) PC Brioche Buns (6 buns), split
6 slices PC Sliced Provolone Cheese
6 PC Black Label Grilled and Marinated Artichoke halves, sliced
6 PC Whole Sweet Red Peppers, halved
Directions:
Preheat grill or grill pan to medium-high heat. Brush both sides of zucchini and eggplant with oil and sprinkle with hot pepper flakes and salt, dividing evenly. Working in batches if necessary, grill, turning occasionally, until tender and grill-marked, 6 to 8 minutes. Transfer to large plate; let cool.
Spread Green Olive Spread over cut sides of buns, dividing evenly. Layer cheese, zucchini, eggplant, artichokes and red peppers over bun bottoms, dividing evenly. Sandwich with bun tops. Wrap tightly in plastic wrap; refrigerate 2 hours before serving.
Chef’s Tip: To serve these sandwiches warm, refrigerate for 2 hours as directed, then remove the plastic wrap and press in a panini press until golden and warmed through, 2 to 3 minutes.
[/tab]
[/tabs]
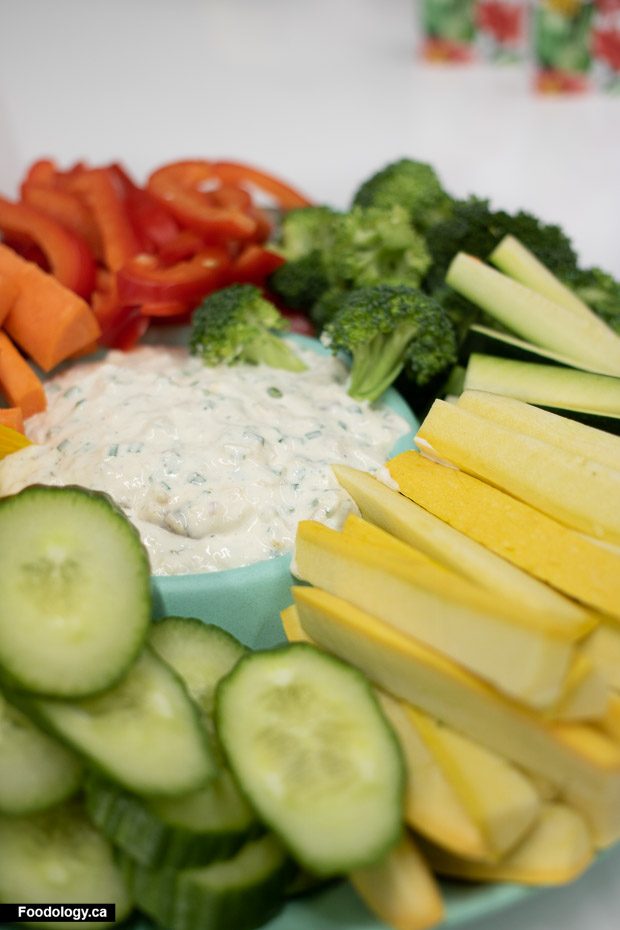
Creamy Triple Onion Dip
All parties need a good dip. Whether is be with a plate of fresh veggies, chips or crackers. Spend a little bit of time to create a homemade dip instead of purchasing something generic in stores.
1/2 cup (125 mL) plain spreadable cream cheese, softened
1/2 cup (125 mL) sour cream
1 shallot, minced
3 tbsp (45 mL) grated PC Splendido Parmigiano Reggiano Cheese
3 tbsp (45 mL) chopped fresh chives
4 tsp (20 mL) PC Caramelized Onion Topping 6
2 tsp (10 mL) fresh lemon juice
1/4 tsp (1 mL) each salt and black pepper
Directions:
Whisk cream cheese with sour cream in small bowl until smooth.
Stir in shallot, Parmigiano-Reggiano cheese, 2 tbsp chives, 1 tbsp onion topping, lemon juice, salt and pepper. Transfer to serving dish. Dollop remaining 1 tsp onion topping over top; swirl into cream cheese mixture using toothpick or tip of knife. Sprinkle with remaining 1 tbsp chives.
Chef’s Tip: The cream cheese is easier to mix when it’s softened, so take it out of the fridge 20 to 30 minutes before making the dip to bring it to room temperature.
[/tab]
[/tabs]
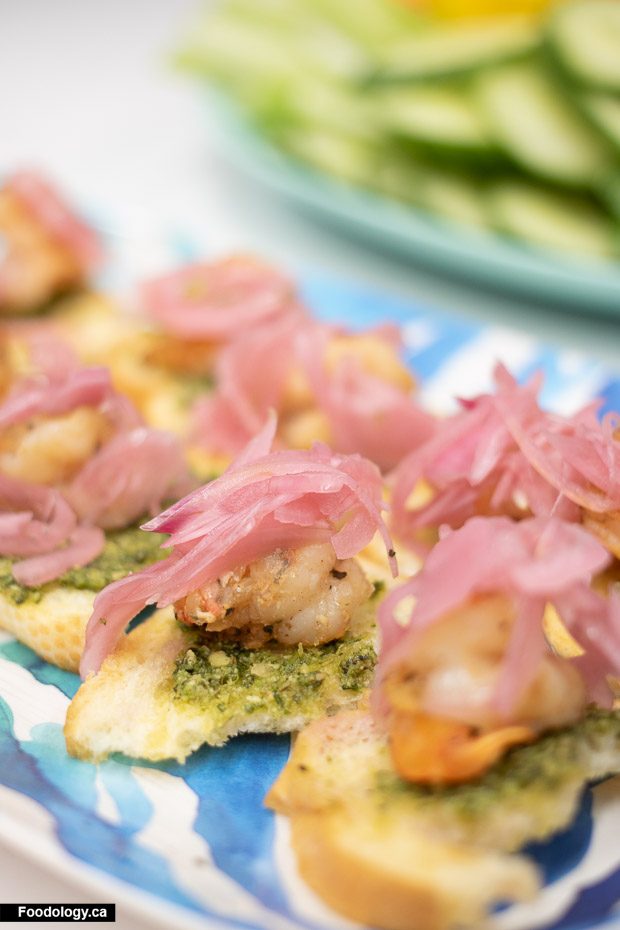
Garlic Herb Shrimp and Pesto Crostini
These grilled crostini are ideal for backyard summer hangouts. You can prep the tomatoes and grill the baguette ahead of time, then toss the shrimp on the grill once everyone is ready to start snacking.
[tabs tab1=”Garlic Herb Shrimp and Pesto Crostini” ]
1 cup (250 mL) PC Axiany Cherry Tomatoes (about half 255 g pkg), chopped
2 tbsp (25 mL) olive oil, plus additional for oiling grill
1 tbsp (15 mL) chopped fresh basil
Pinch (0.5 mL) salt
Half baguette, sliced diagonally into 1/4-inch/5 mm thick rounds (12 to 15 slices)
1 pkg (340 g) frozen PC Garlic & Herb Grilling Raw Butterflied Shrimp
2 tbsp (25 mL) PC Pesto
Directions:
Stir together tomatoes, 1 tbsp oil, basil and salt in small bowl. Set aside.
Preheat grill to medium heat. Brush both sides of baguette slices with remaining 1 tbsp oil, dividing evenly. Arrange in single layer on grill. Cook, turning once, until grill-marked, about 4 minutes. Transfer to large plate. Set aside.
Brush grill with oil. Arrange frozen shrimp, shell side down, in single layer on grill. Close lid and cook over medium heat, turning halfway through cooking time, until opaque throughout and shells are pink, 5 to 7 minutes. Transfer to separate large plate; remove and discard shells.
Spread pesto over top of baguette, dividing evenly. Top with shrimp and tomato mixture, dividing evenly.
Chef’s Tip: No barbecue? Arrange baguette slices in a single layer on a baking sheet and drizzle with oil; bake in 400°F (200°C) oven, flipping baguette once, until crispy and light golden, about 6 minutes. Set aside. Arrange shrimp, shell side down, in a single layer on a parchment paper-lined baking sheet; bake in 450°F (230°C) oven until opaque throughout and shells are pink, 10 to 12 minutes.
[/tab]
[/tabs]
Maple Chia Fresca
Need a unique refreshing drink to go with your party? Try this Maple Chia Fresca which is non-alcoholic. Chia seeds develop a gelatinous coating when soaked, giving this speckled mocktail a unique yet satisfying texture. Give the drink a good shake before serving.
Combine maple water and chia seeds in 2-cup (500 mL) jar with tight-fitting lid. Cover and shake to combine. Refrigerate 1 hour.
Add lemon juice and maple syrup; cover and shake to combine. Divide among serving glasses. Garnish with mint sprigs (if using).
Tip: Try lime juice instead of lemon juice and adjust the sweetness by adding more or less maple syrup.
[/tab]
[/tabs]
Don’t forget the dessert
For the hot Summer weather, don’t forget the dessert. I really loved the PC SKYR Lactose-free Superfruit yogurt bar and the PC Rocky Road Scoop Shop Bar.
Check out the newest items in the PC Insiders Collection as it’s easy on the wallet and tastes great. For more recipes check out presidentschoice.ca.
For the longest time, I’ve denied the fact that I needed a stand mixer. I always just told myself that I would get nice arm muscles from manually creaming sugar and butter together. Also making whipped cream was no problem with a whisk. That was then and this is now.
I love making sweet treats to share with family and friends, but I don’t necessarily have the time or energy to mix it all by hand now. With the Cuisinart Precision Master 5.5 Qt Stand Mixer, I made chocolate dipped matcha shortbread cookies using a recipe by Oh Sweet Day.
Besides the usual functions of baking cookies and bread, here are some ways to use your stand mixer beyond baking:
1. Shredding meat to make pulled pork
Strange but it’s true. Turn on the mixer until it is all shredded. I used to use 2 forks to shred pork or chicken, but now I don’t need to.
2. Whip those mashed potatoes
Once the potatoes are boiled, use the whisk and mix on medium until potatoes are completely mixed with no lumps. As you add items like butter, milk, and herbs, you can gradually increase the speed to make it fluffier. Alternatively, you can also make cauliflower puree too.
3. Egg-cellent idea
If you need to make devilled eggs or an egg salad in large batches for a party and you’re short on time, throw it into the mixer.
4. Meatballs, Meatloaf and Burgers
Mashing meat with your hands isn’t always comfortable, especially when you need to mix pork and beef together. There is also a meat grinder attachment that has a sausage stuffer kit. Sausage for days.
5. Guacamole
Making guacamole in small batches can be easily done with a fork, but if you need to make a big batch for a party, utilize the mixer to pulverize those avocados and mix in any extra items.
6. Homemade pasta by hand
Did you know, you can get attachments for the stand mixer such as the pasta extruder or the pasta roller & cutter? By utilizing the motor of the mixer, you’ll never have to buy pasta again. Fresh is always the best.
Those are just a few ideas to get your ideas flowing. If you have a stand mixer or considering getting one, it’s more versatile that it seems.
An easy brunch to put together on the weekend is a waffle platter. You just need to assemble the ingredients together on a board and serve. I’ve seen them create this at restaurants in town, but it is pretty pricey, so I decided to create it at home. I went with gluten-free waffles because it can get really crispy because it uses rice flour and tapioca starch. You can find these items at most major grocery stores in the baking aisle.
There are many waffle makers on the market, but I have the Cuisinart Vertical Waffle Maker. Since it is vertical instead of flat like other machines, it requires less counter space and is easy to store when not in use. It’s a pretty smart machine and will beep when your waffle is ready. Easy to clean afterwards too.
Gluten-Free Waffle Platter
[tabs tab1=”Directions”]
[tab id=1]
Makes 3 waffles
Ingredients
1½ cups (375 ml) rice flour
¼ cup (60 ml) tapioca starch
2 tablespoons (30 ml) milk powder
2 tablespoons (30 ml) granulated sugar
2 teaspoons (10 ml) baking powder
¾ teaspoon (3.75 ml) kosher salt
1½ cups (375 ml) buttermilk
1 large egg
2 teaspoons (10 ml) pure vanilla extract
1 /3 cup (75 ml) vegetable oil
Combine dry ingredients in a large mixing bowl; whisk until well blended. In either a large measuring cup or separate mixing bowl, combine the remaining ingredients and whisk to combine. Add the liquid ingredients to the dry and whisk until smooth.
Preheat the waffle maker to desired setting (a tone will sound when preheated).
Pour 1 full cup of batter through the top of the spout. When tone sounds, the waffle is ready. Carefully open the waffle maker and remove baked waffle. Close waffle maker and repeat with remaining batter.
For best results, serve immediately with your favourite savoury breakfast items. I chose potato salad, brussel sprouts, eggs, and bacon.
[/tab]
[/tabs]
There it is, a delicious waffle platter for brunch.
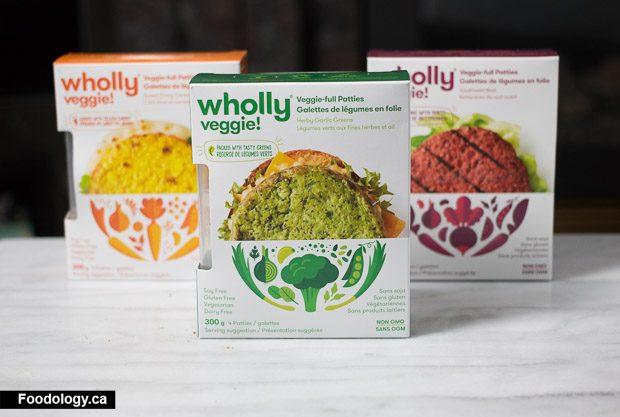
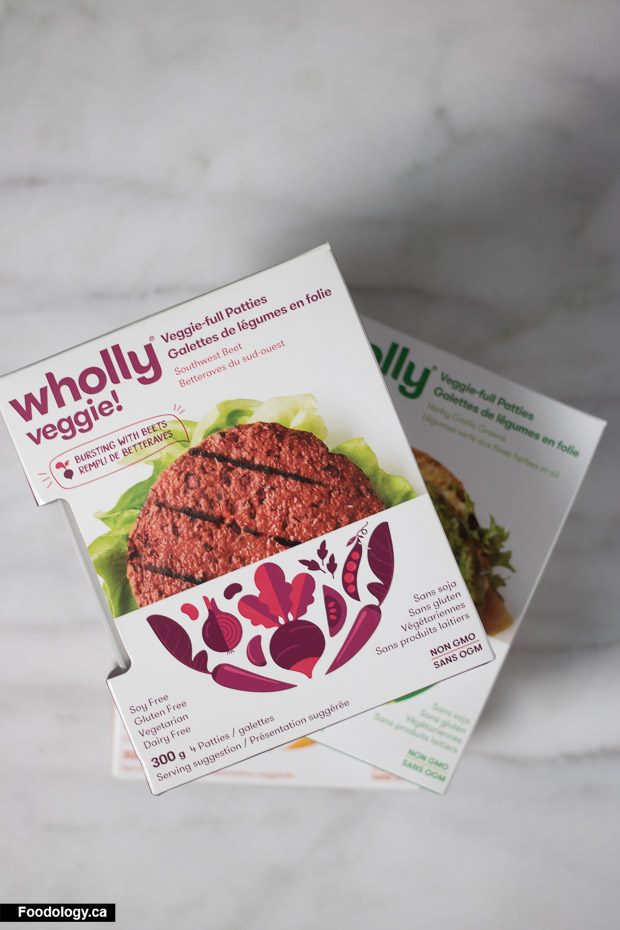
Wholly Veggie! are veggie patties that are soy-free, gluten-free, dairy-free, GMO-free, and no added sugar. Started in Toronto in 2013 by David and John, they are on a mission to add more veggies on your plate.
They have debuted with 3 flavours – Southwest Beet, Sweet Curry Carrot, and Herby Garlic Greens. I tried all 3 flavours and they were decent. Instantly, people would think to have them in burgers, but there are many ways to incorporate into your meal in simple ways.
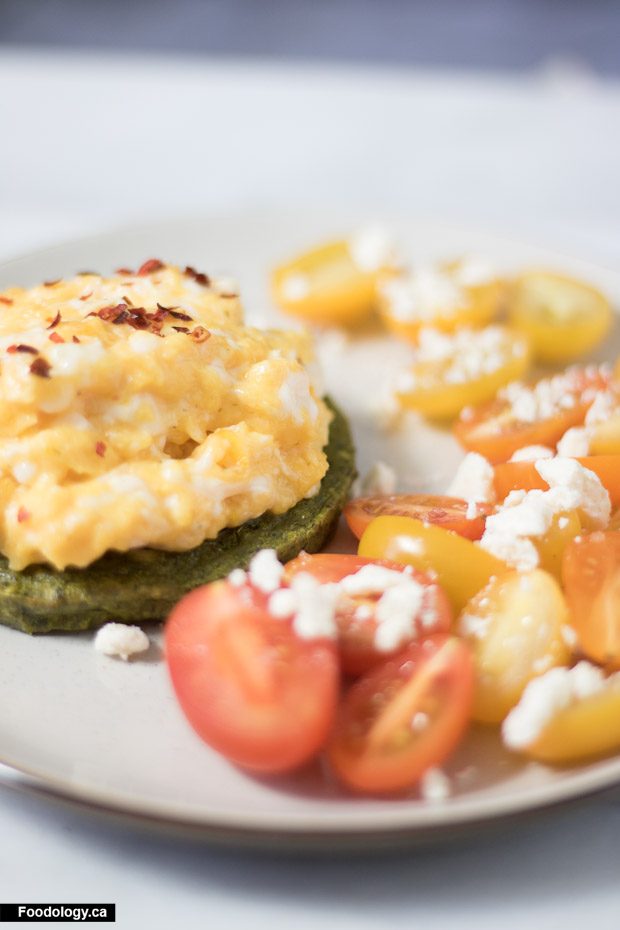
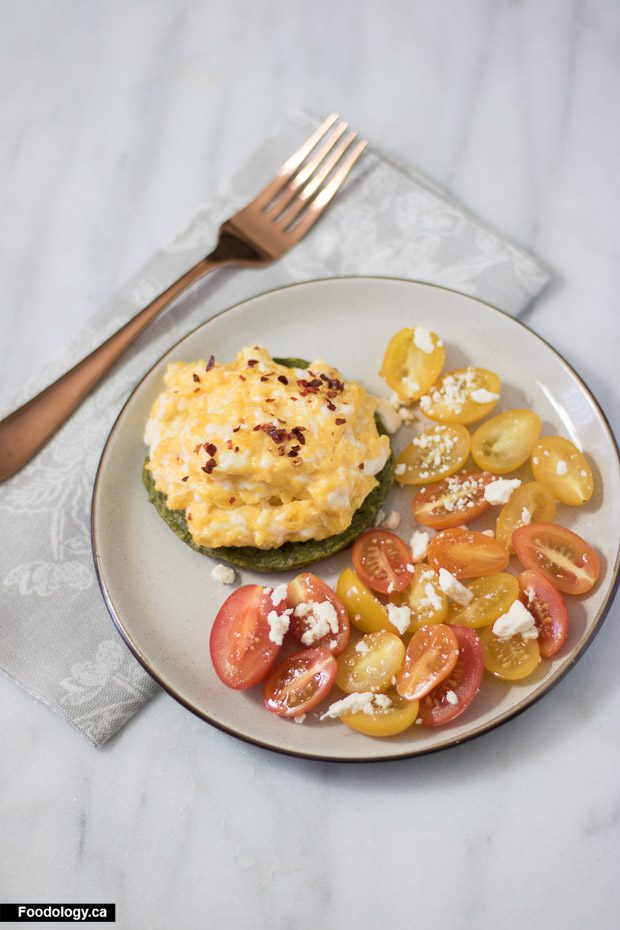
Breakfast with Herby Garlic Greens Patty
I used the herby garlic greens patty in my breakfast. What makes the patty green is spinach, green beans, green peas, broccoli, and herbs. I thought it would pair well with gooey scrambled eggs with chili peppers. Then a simple tomato salad with salt and feta.
You can even use the patty as a base for a unique pizza.
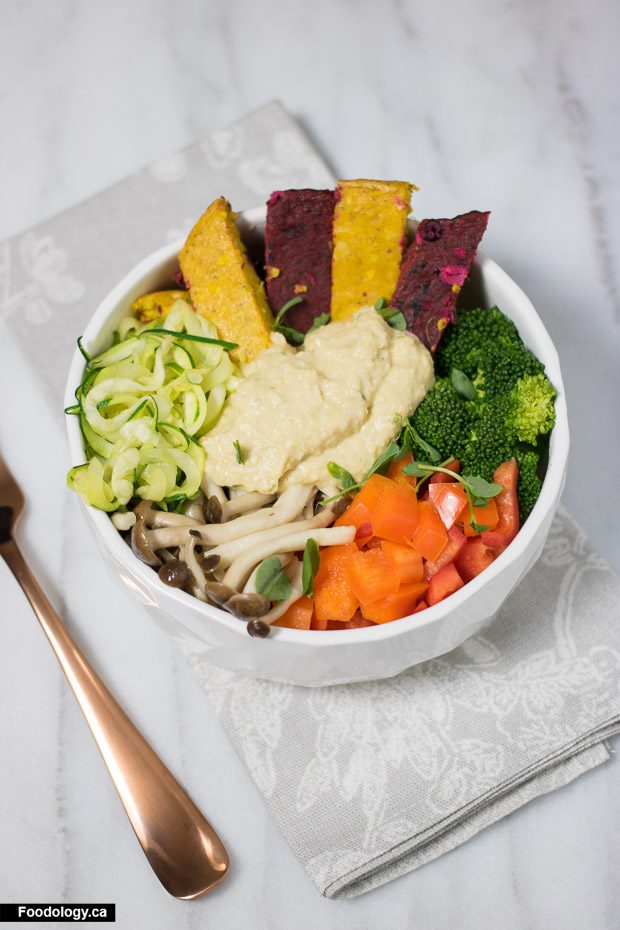
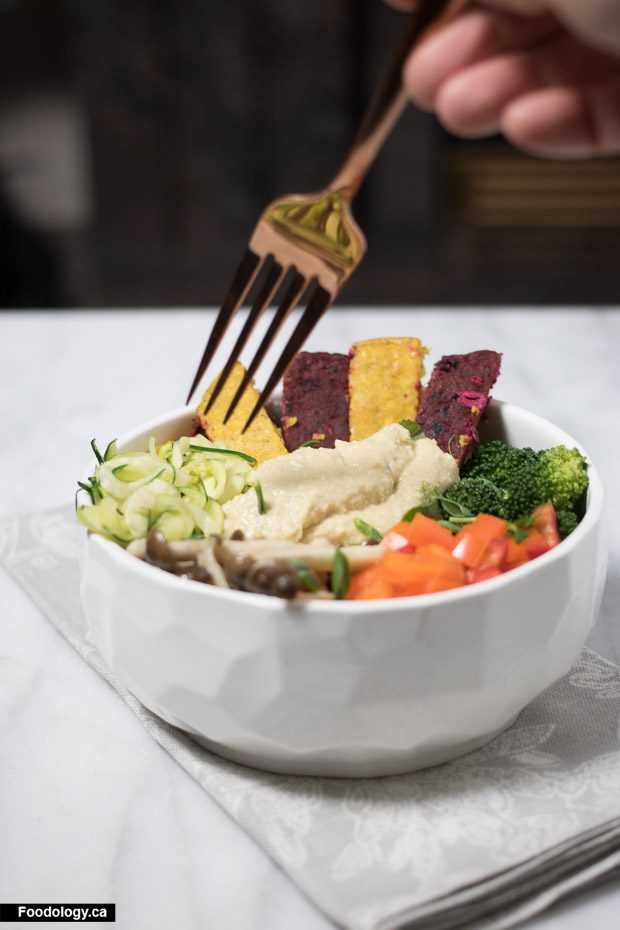
Veggie Bowl with Southwest Beet and Sweet Curry Carrot Patties
I made this with a base of quinoa on the bottom, them topped it with zucchini noodles, sautéed mushrooms, red and orange peppers, broccoli, hummus and the Southwest Beet patty and Sweet Curry Carrot patty.
Final Thoughts
All 3 flavours were good and easy to add to my meals. It’s quick and easy to cook. My favourite way of cooking them are the toaster just like bread. A few minutes and its ready.